Getting Started
Real-Helper: Agent is free to download. Sign in with your Apple ID to create your account — no subscription required.
First Launch
- 1Download Real-Helper: Agent from the App Store and open it.
- 2Tap Sign in with Apple and authenticate with Face ID, Touch ID, or your Apple ID password.
- 3After sign-in, you'll land on the Contacts tab. Take a moment to fill in your profile (see below) before adding contacts.
💡 Tip: If you ever switch devices, signing in with the same Apple ID restores all your contacts, properties, and conversations automatically.
Your Agent Profile
Your profile is what your connected buyers see in the Real-Helper app when they view their agent. Fill it out completely to make a strong first impression.
Editing Your Profile
- 1Tap the Profile tab (bottom right).
- 2Tap any field to edit it — name, phone, email, bio, brokerage name, and license number.
- 3Tap your profile photo area to upload a headshot from your photo library.
- 4You can also add a brokerage logo and a link to your license page.
- 5Tap Save when done.
💡 Tip: Your bio and photo appear in the header inside the Real-Helper app when a contact connects with you. A professional headshot and a short, friendly bio go a long way.
Contacts
The Contacts tab is your list of clients and clients-to-be. Each contact shows their connection status — whether they've linked to you in Real-Helper. Contacts who are connected have a live chat thread; others are stored for reference and open house follow-up.

Adding a Contact
- 1Tap the + button (top right of the Contacts tab).
- 2Enter the contact's name, phone number, and email address.
- 3Tap Save. The contact appears in your list. A chat thread becomes available once they connect to you via Real-Helper.
Connecting with Buyers Using Real-Helper
When a buyer uses the Real-Helper home-search app, they can connect to you so that your messages and shared properties appear directly inside their app. The connection is initiated from the buyer's side using your agent code.
- 1Your agent code is shown on your Profile screen — share it with your buyer.
- 2The buyer opens Real-Helper, goes to Settings → Connect to Agent, and enters your code.
- 3Once connected, the buyer appears in your Contacts list (if not already there) and their connection status shows as linked.
- 4From this point on, messages you send and properties you share appear inside their Real-Helper app in real time.
💡 Tip: You can still use Real-Helper: Agent to manage contacts who don't use Real-Helper — you just won't have the in-app message delivery. Notes, property records, and open house sign-ins work the same either way.
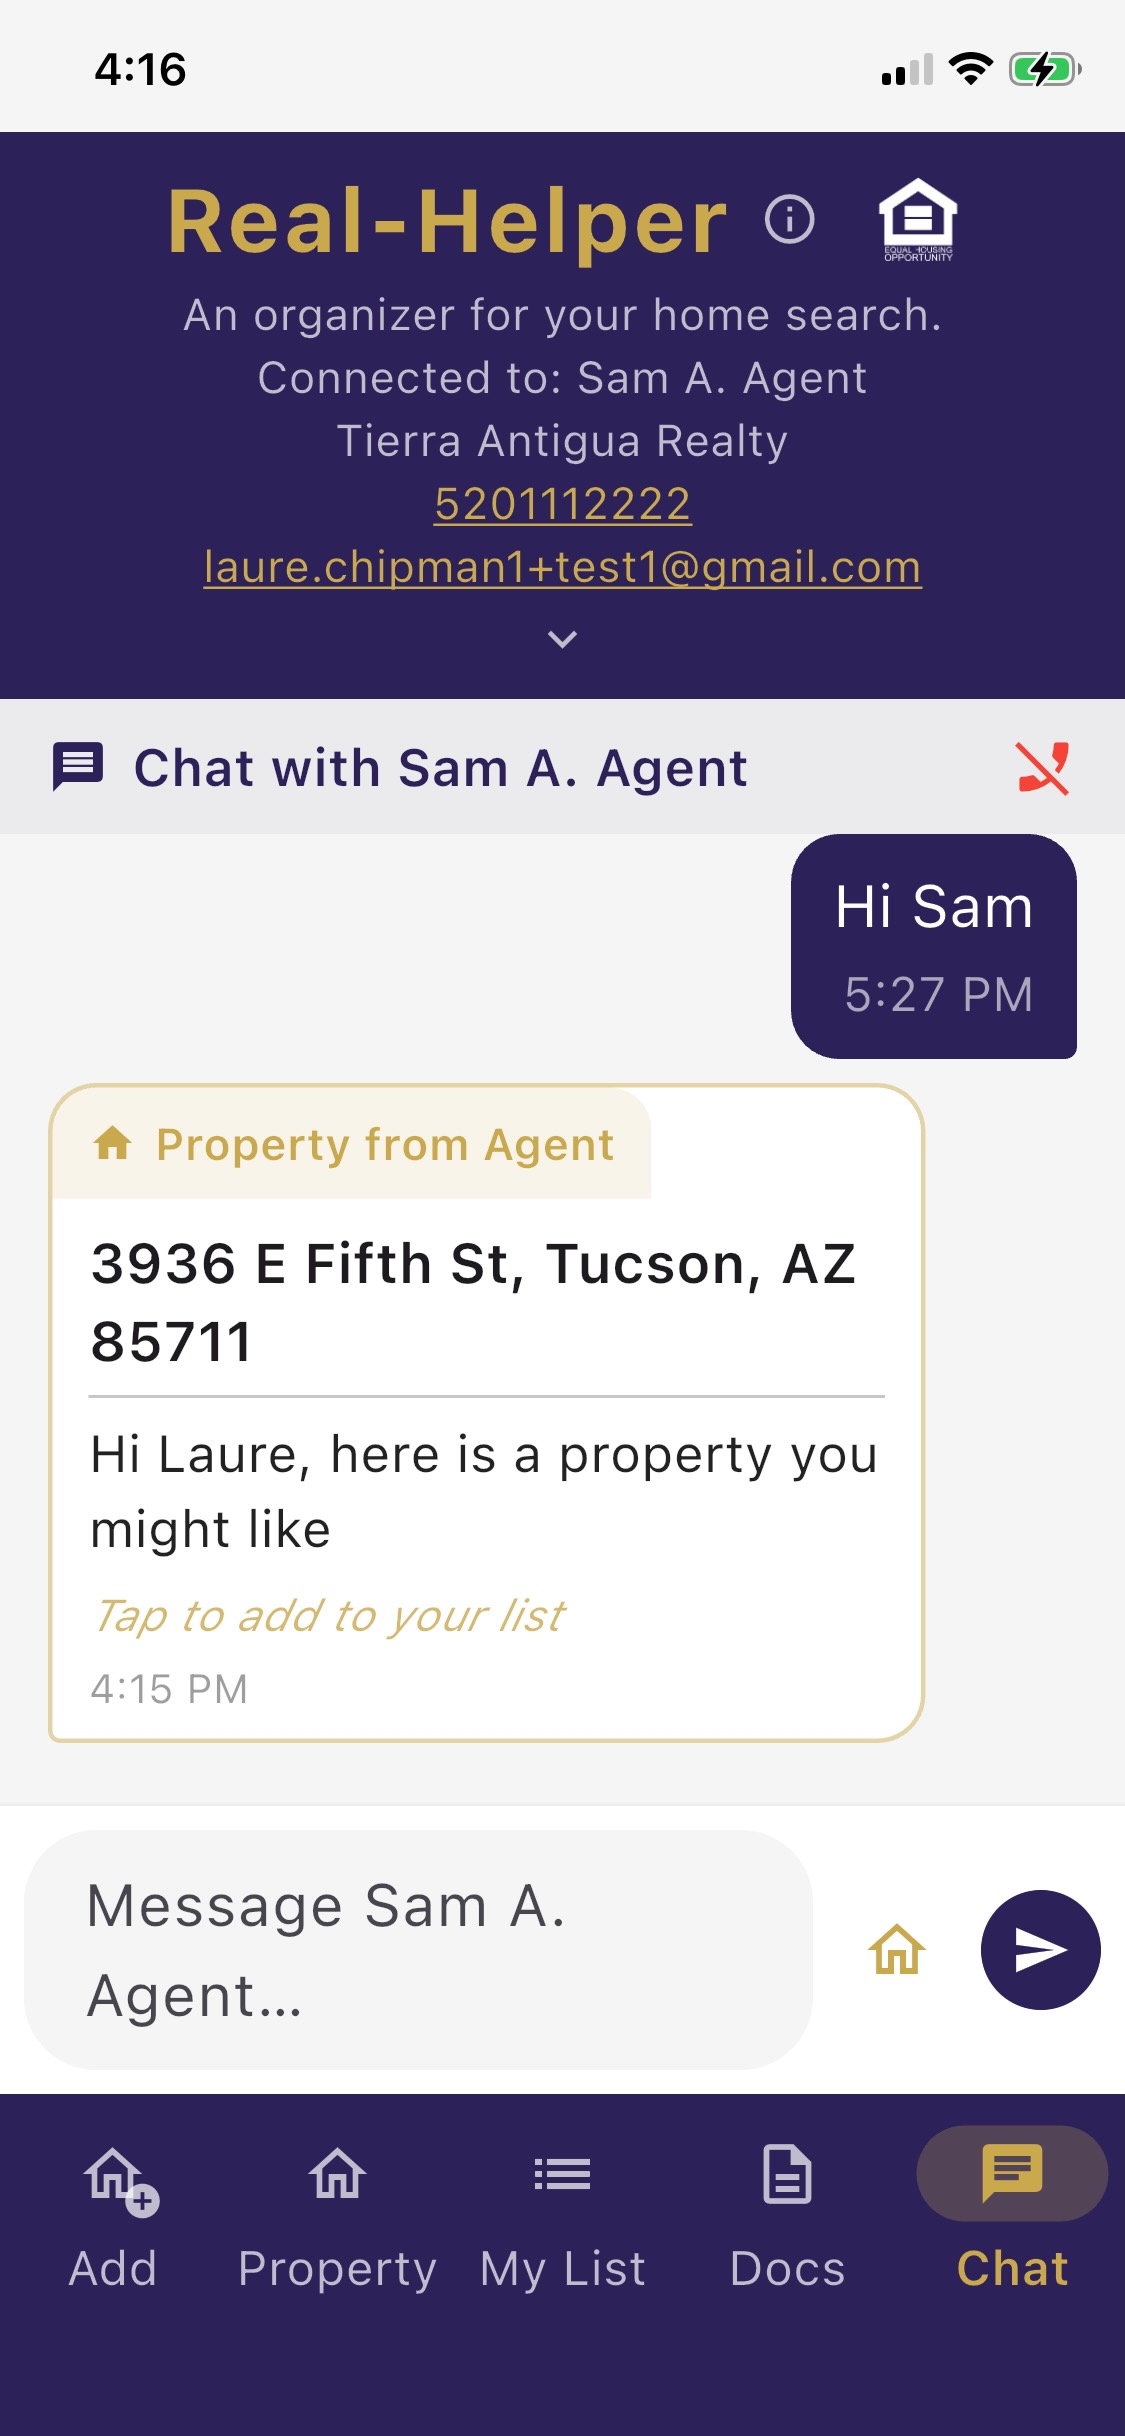
Chat
Contacts who have connected to you via Real-Helper have a live chat thread. Messages you send appear in their Real-Helper app in real time.
Sending Messages
- 1Tap a contact to open their chat thread.
- 2Type your message in the text field at the bottom and tap Send.
- 3If the buyer is connected to Real-Helper, they receive the message in their app. Unread messages are tracked and shown on your contact row.
💡 URLs in messages are tappable. Paste a listing link, a neighborhood walk-score page, or any web address into a message and it becomes a live link — both for you and your buyer.
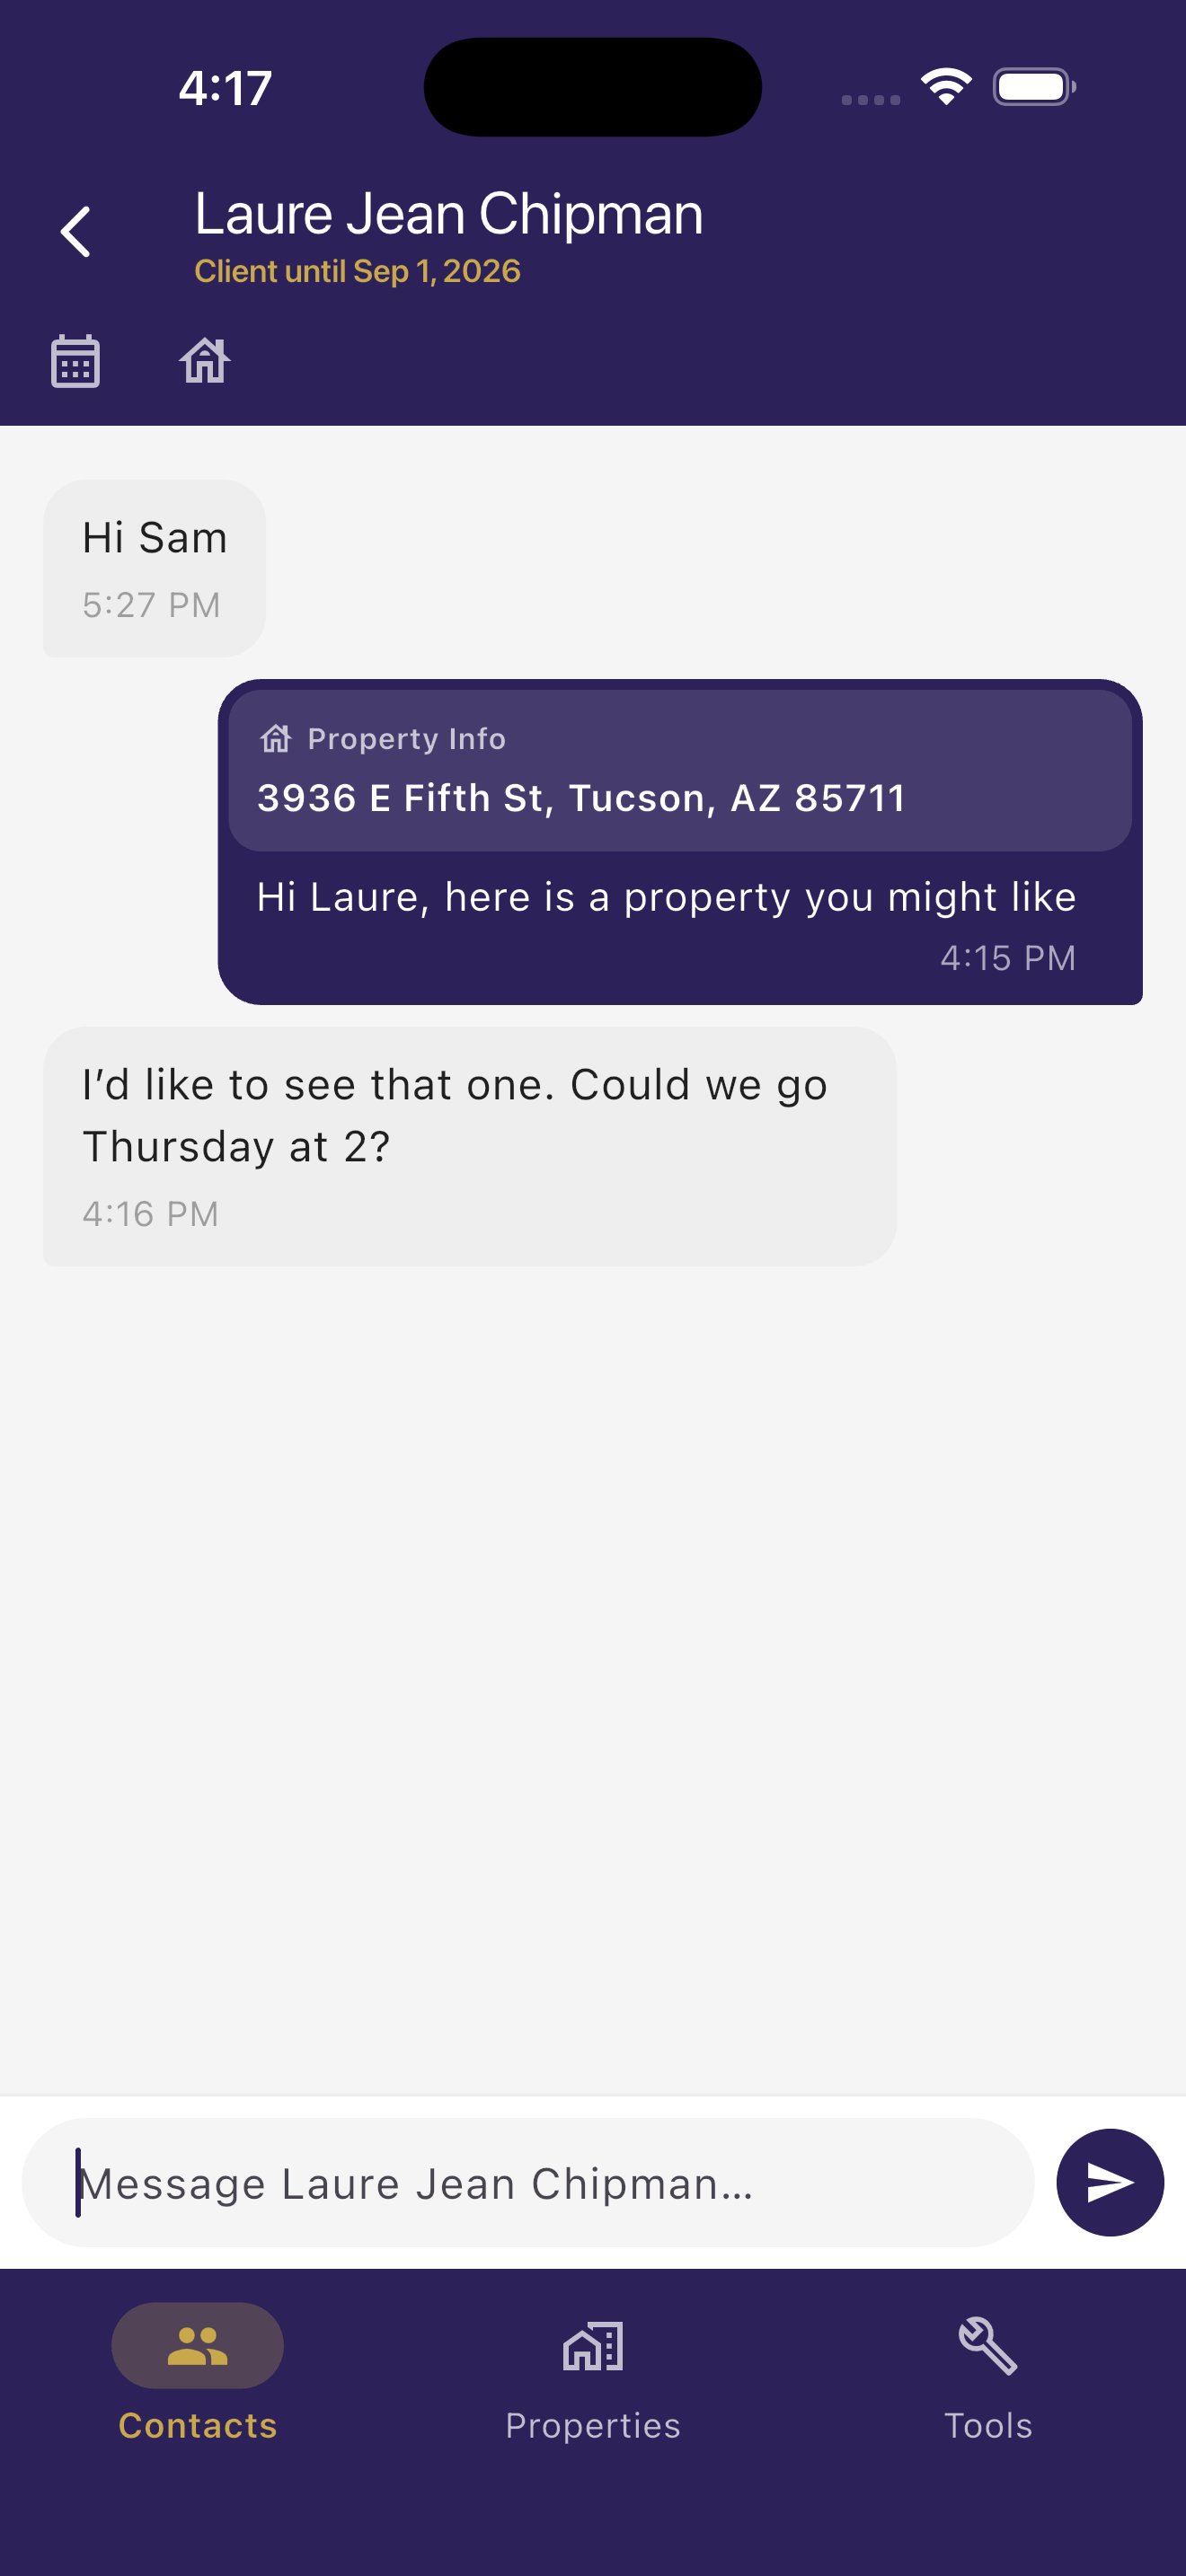
Sharing a Property in Chat
You can send a property card directly from the chat thread or from a property's detail page. Property cards include the address, your notes, and any Property Data you've pulled.
- 1From In-App Chat, tap the house icon in the header.
- 2Choose a property from your list.
- 3Tap Send. The property card appears in the thread and in the connected buyer's Real-Helper property list.
Properties
The Properties tab is your library of property records — each one has an address, notes, status tag, and optionally, public-record data pulled from RentCast.
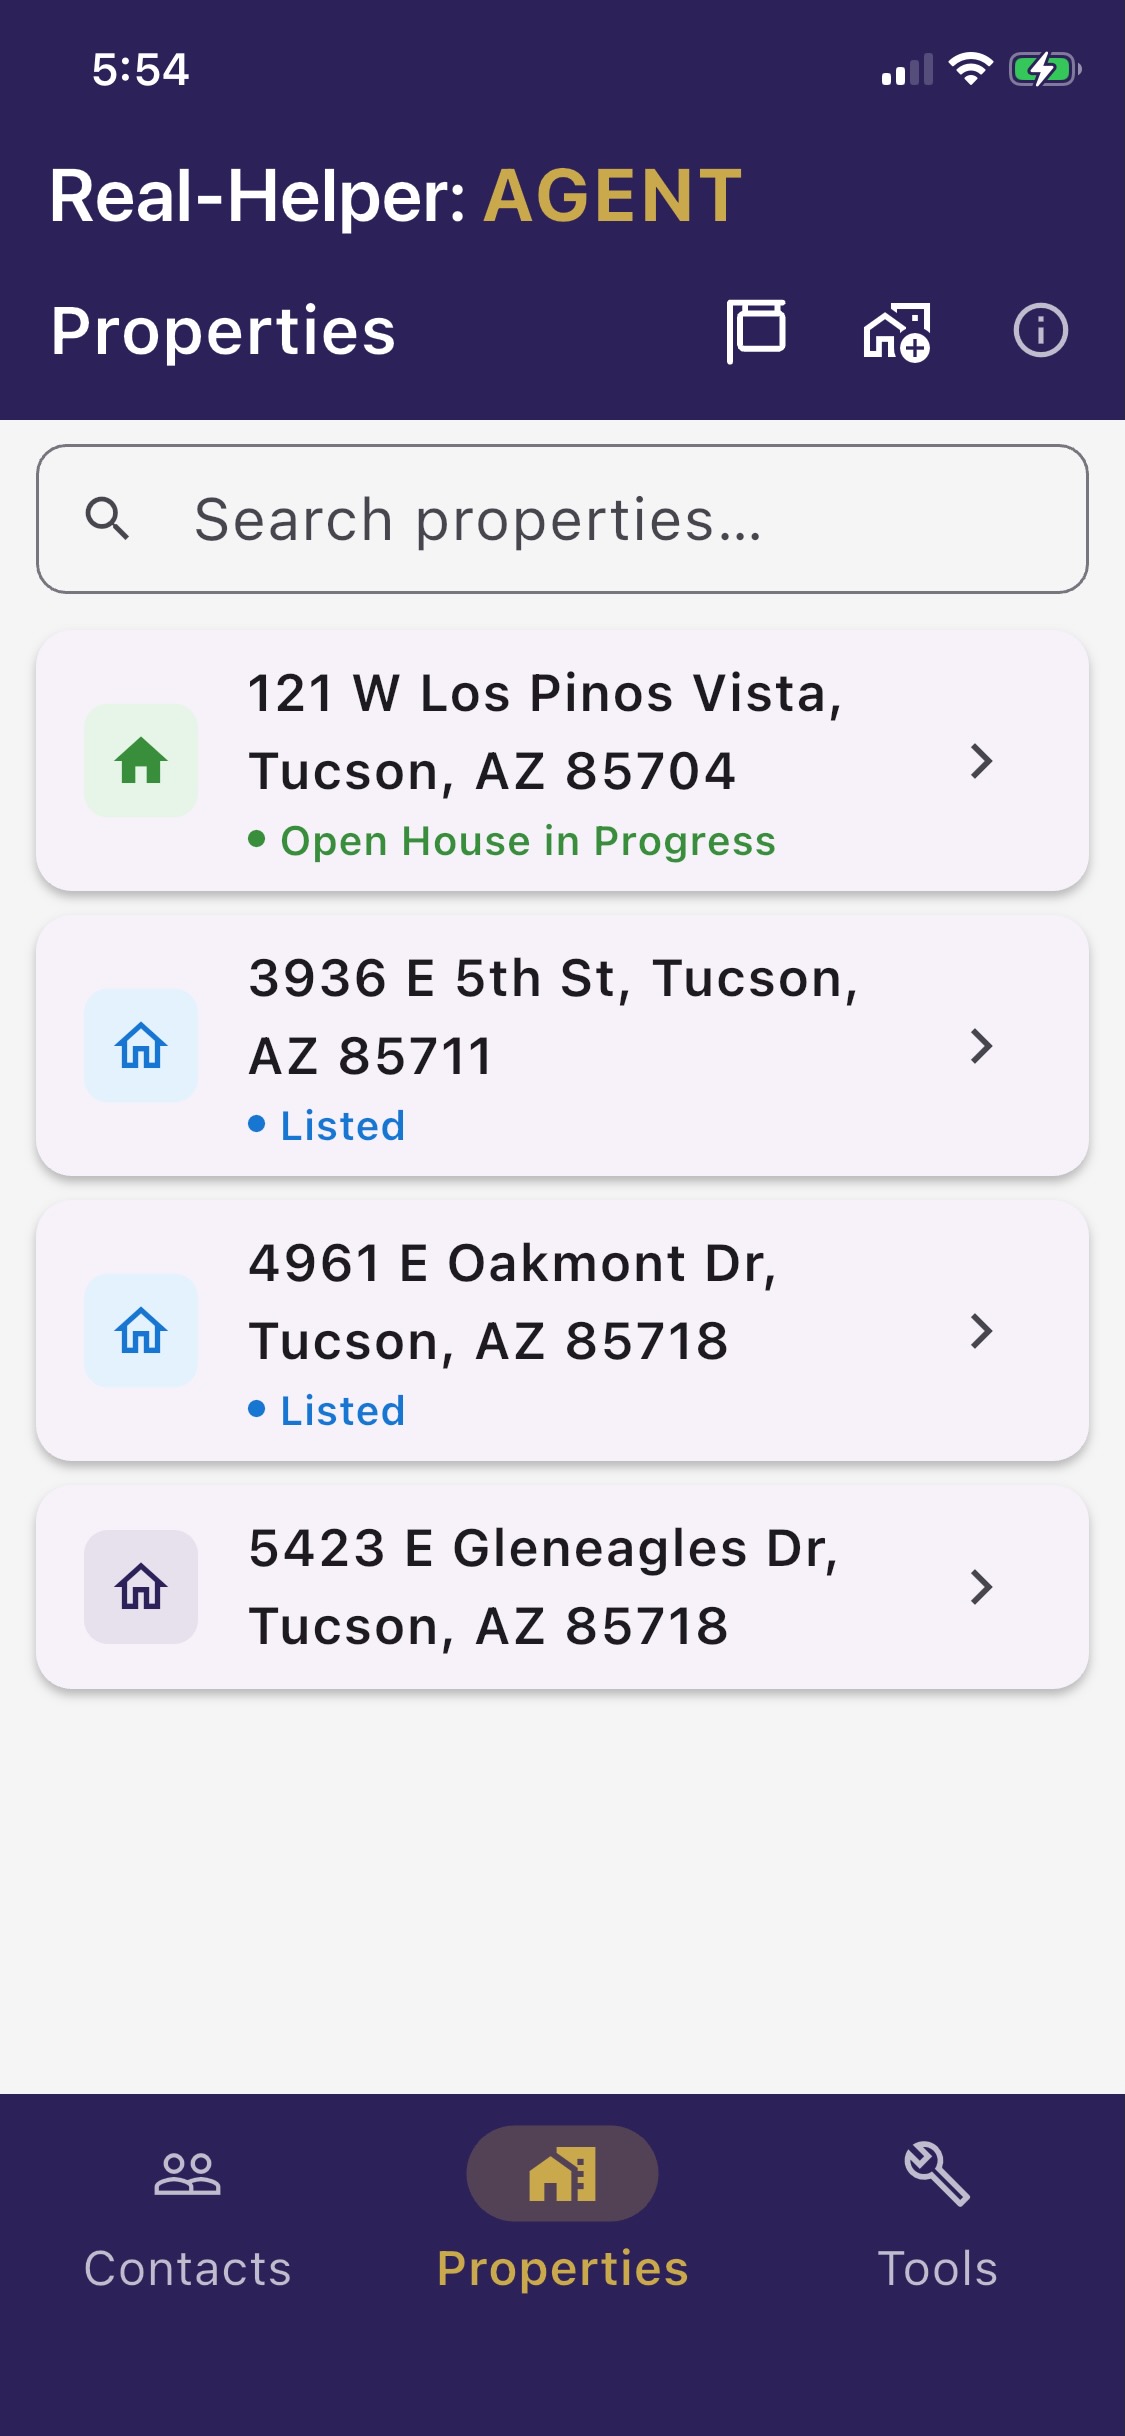
Adding a Property
- 1Tap the + button on the Properties tab.
- 2Enter the address. You can also add notes, a status tag (e.g. Active, Pending, Sold), and any other details you want to track.
- 3Tap Save.
💡 Tip: Status tags let you keep a full history of properties you've shown — not just the ones currently active. Filter by status on the Properties tab to quickly find what you need.
Property Data In-App Purchase
Property Data pulls public-record information for any property — assessed value, estimated market value, last sale price, beds, baths, square footage, lot size, and more — directly from RentCast.
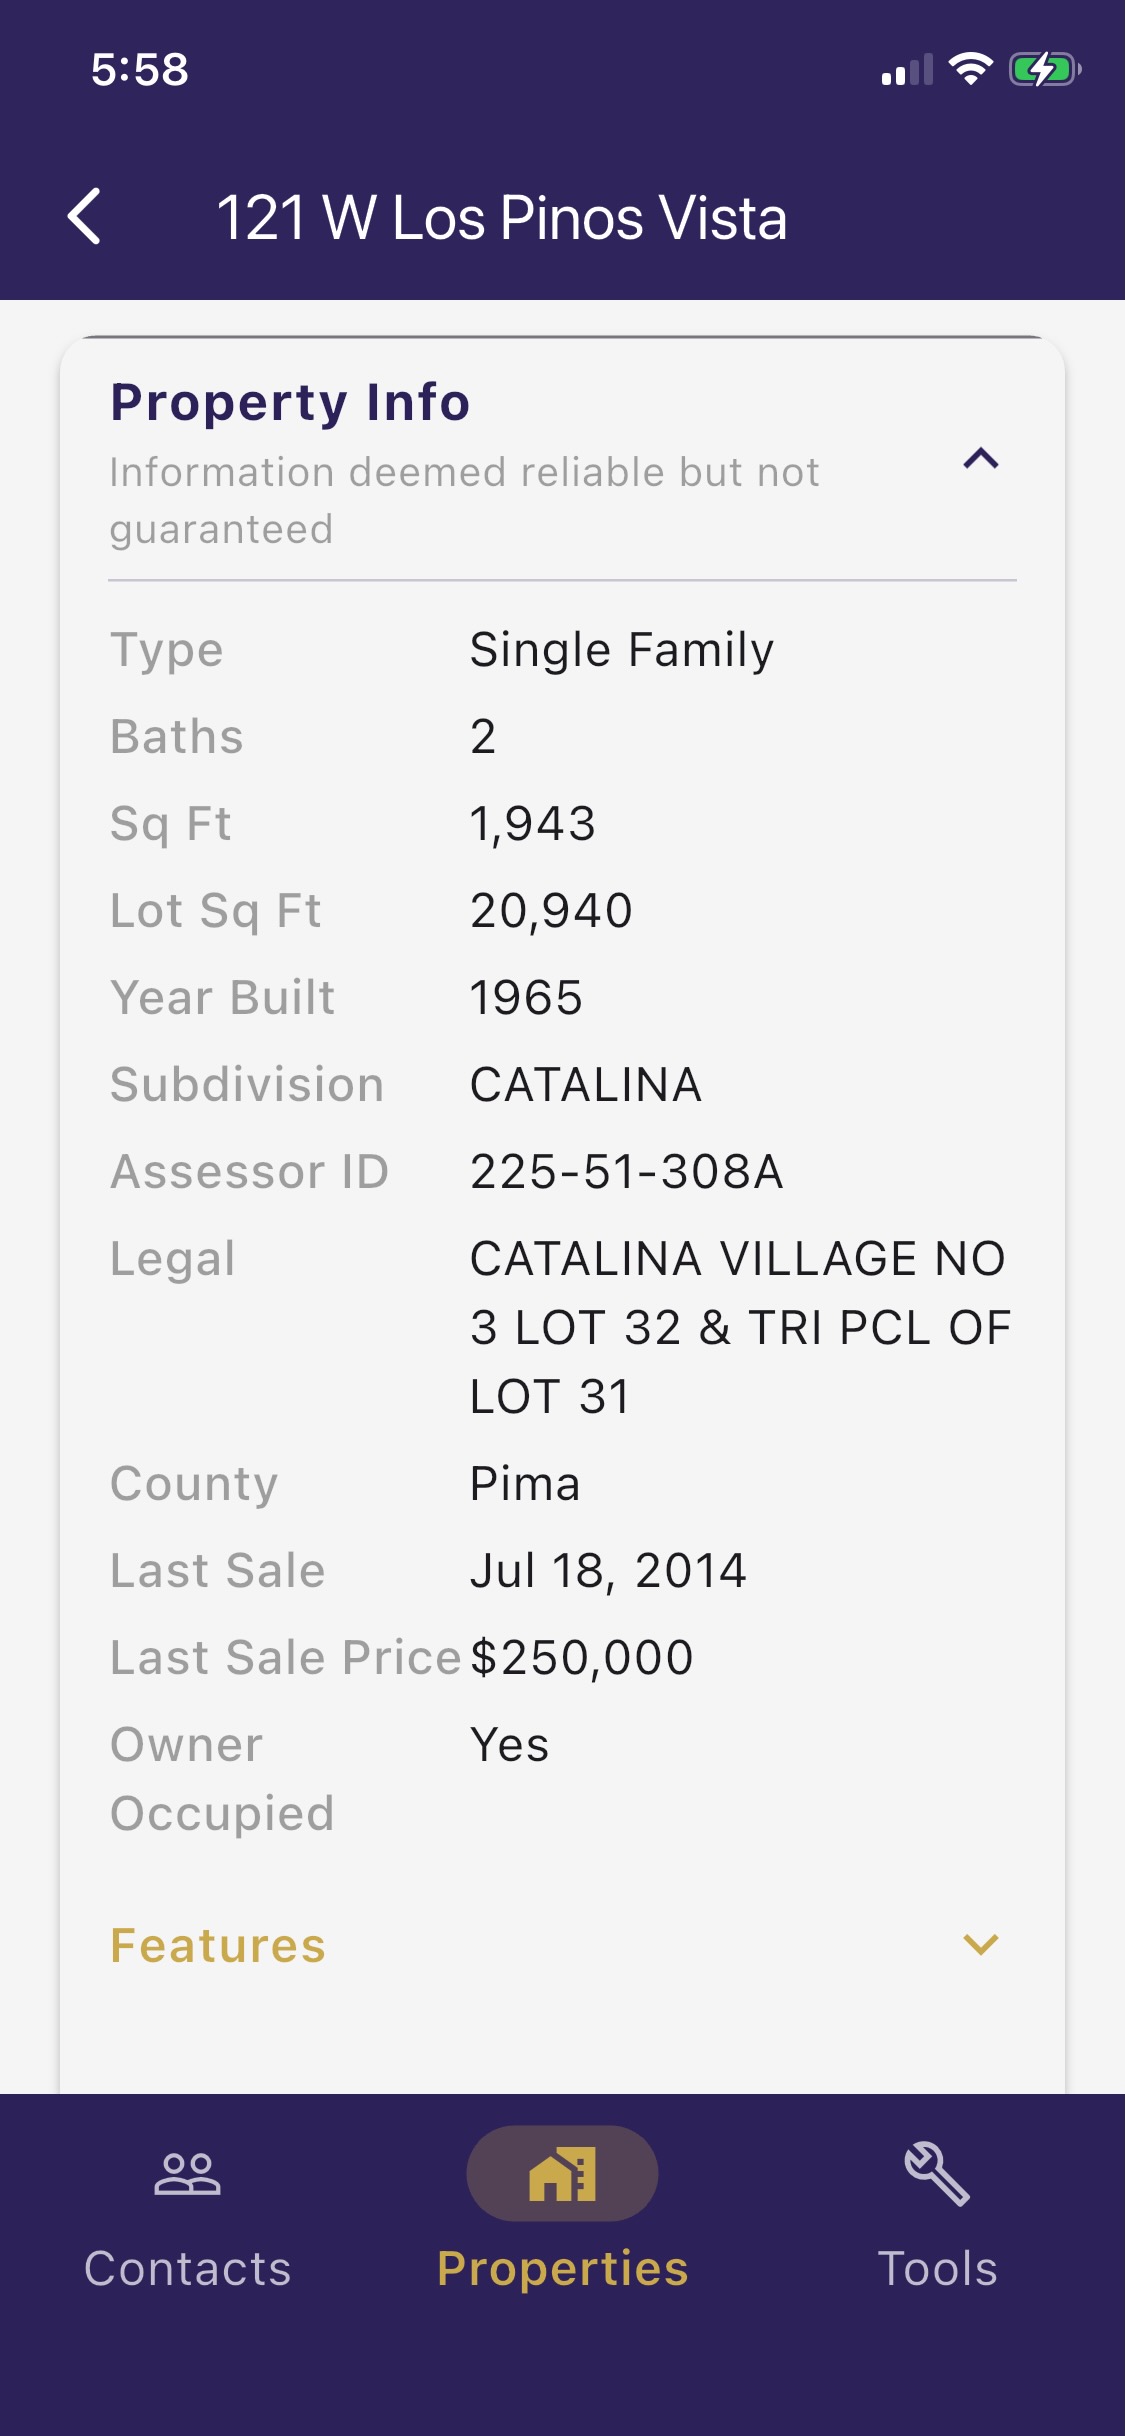
- 1Open a property's detail page.
- 2Tap Get Property Data. Your remaining query count is shown next to the button.
- 3If you have queries remaining, the data appears on the page within a few seconds and is cached — you won't need to fetch it again.
- 4If you're out of queries, a purchase sheet appears (see Buying a Data Pack below).
ℹ️ Note: Property Data is sourced from public records and deemed reliable but not guaranteed. Always verify important figures with the county assessor or listing agent before advising your clients.
Open House
Real-Helper: Agent includes a digital open house sign-in tool. Visitors sign in on your device — an iPad propped up at the entrance works perfectly.
Running the Sign-In Sheet
Open the Open House tab and select or create an open house event for the property you're hosting. Then leave your device where visitors can reach it to sign in.

- 1Tap Open House in the tab bar.
- 2Tap New Open House and select the property (or enter an address).
- 3Tap Start Sign-In. The sign-in form appears, ready for visitor input.
- 4Each visitor enters their name, email, and phone number and taps Submit.
- 5The form resets automatically, ready for the next visitor.
💡 Tip — locking the iPad with Guided Access: If you want to prevent visitors from leaving the sign-in screen, iOS has a built-in kiosk mode called Guided Access (Settings → Accessibility → Guided Access). Enable it, drawing a circle around the back button to make it inactive, then triple-click the side button before your first visitor signs in — the iPad will be locked to Real-Helper: Agent. Triple-click again and enter your Guided Access passcode when you're ready to end the session.
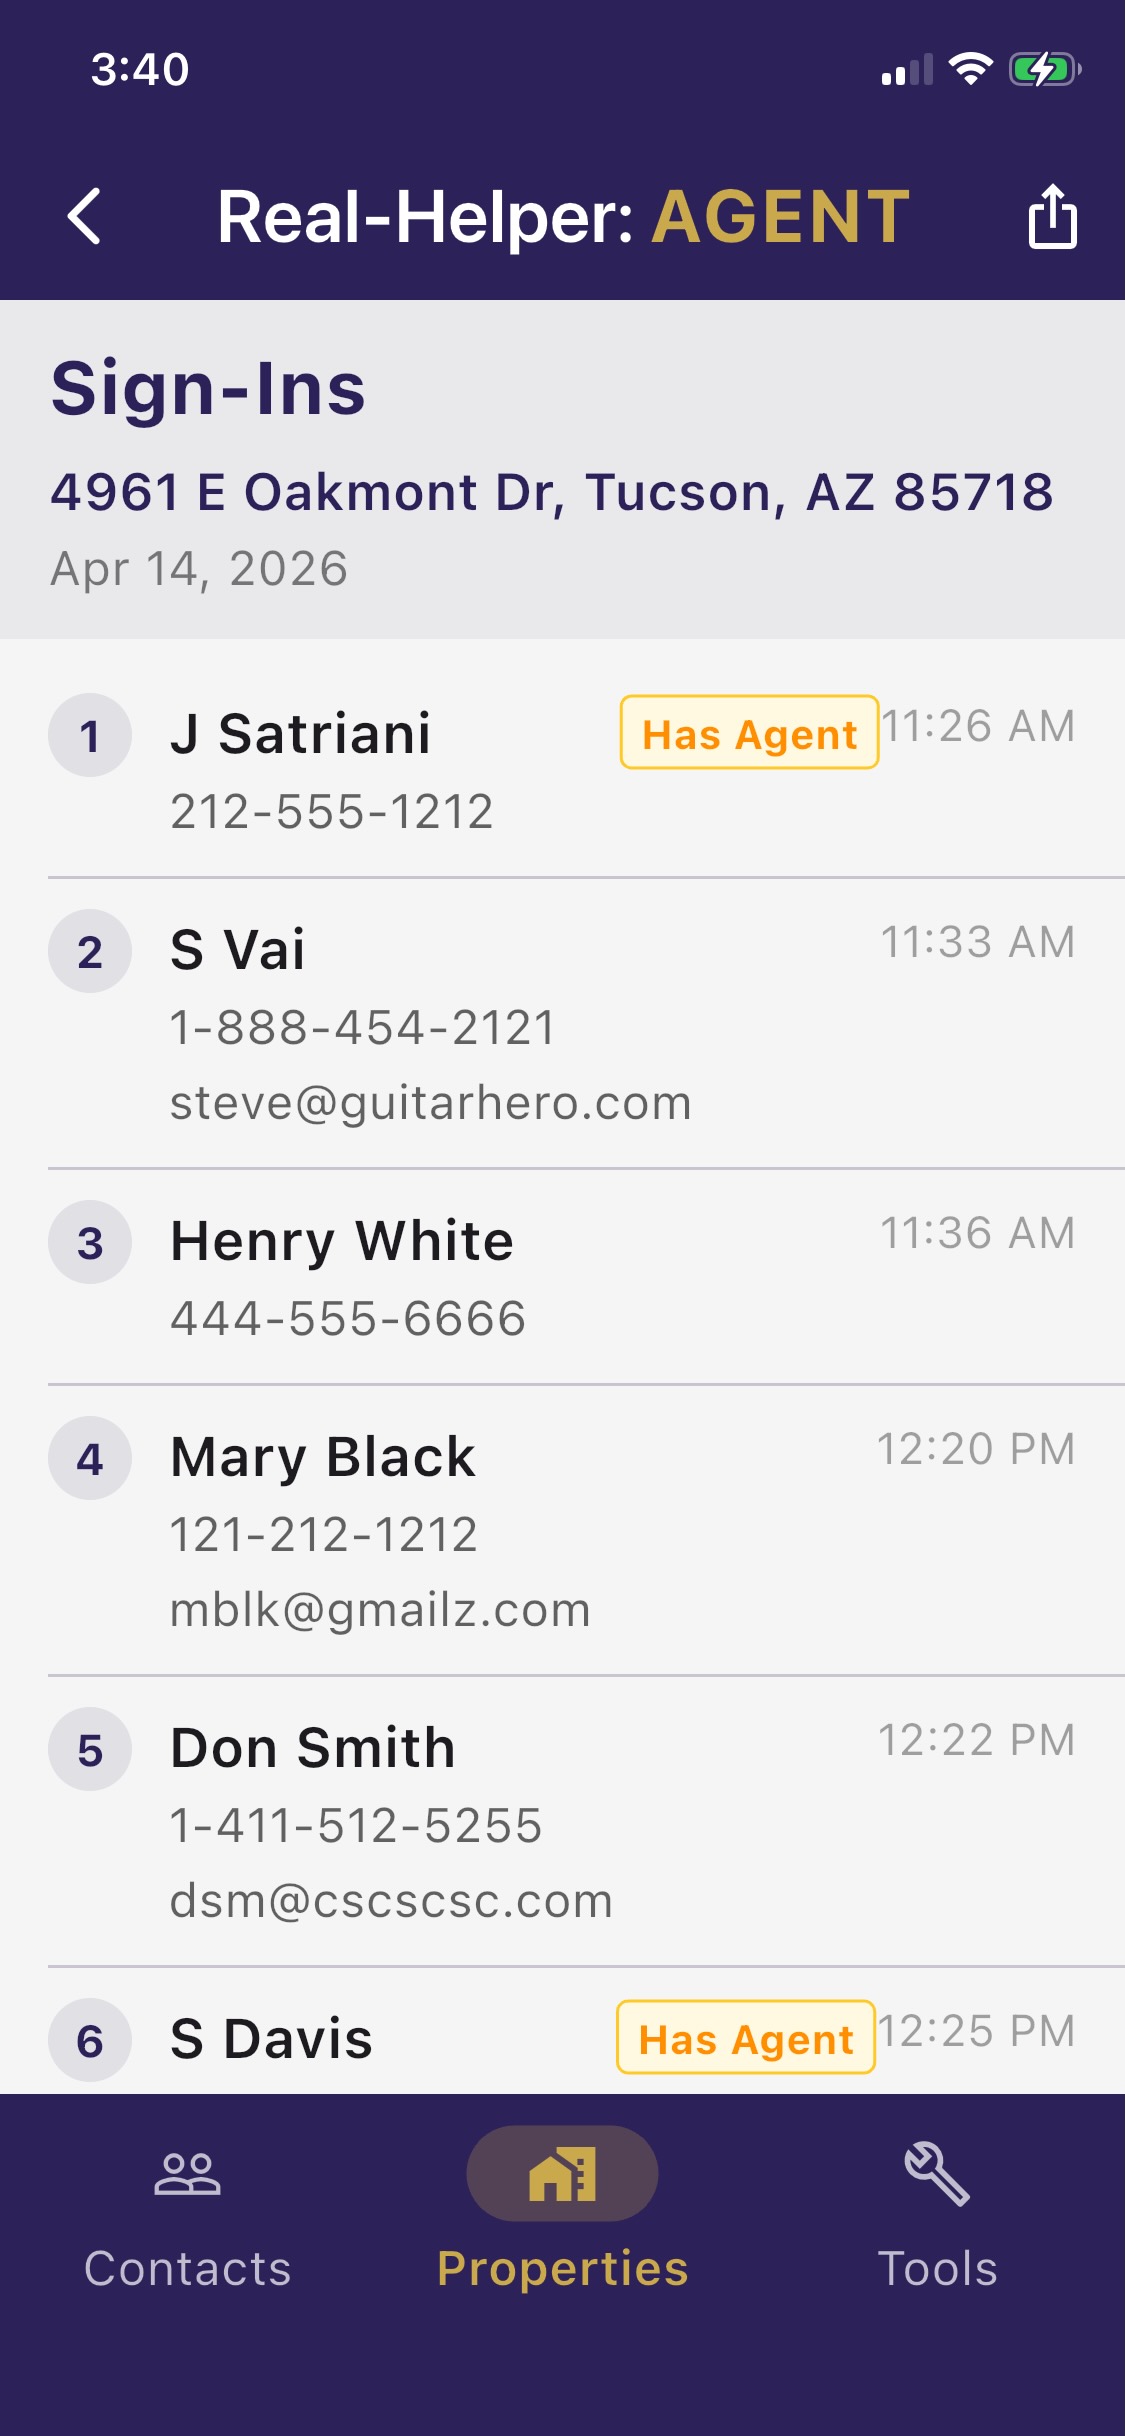
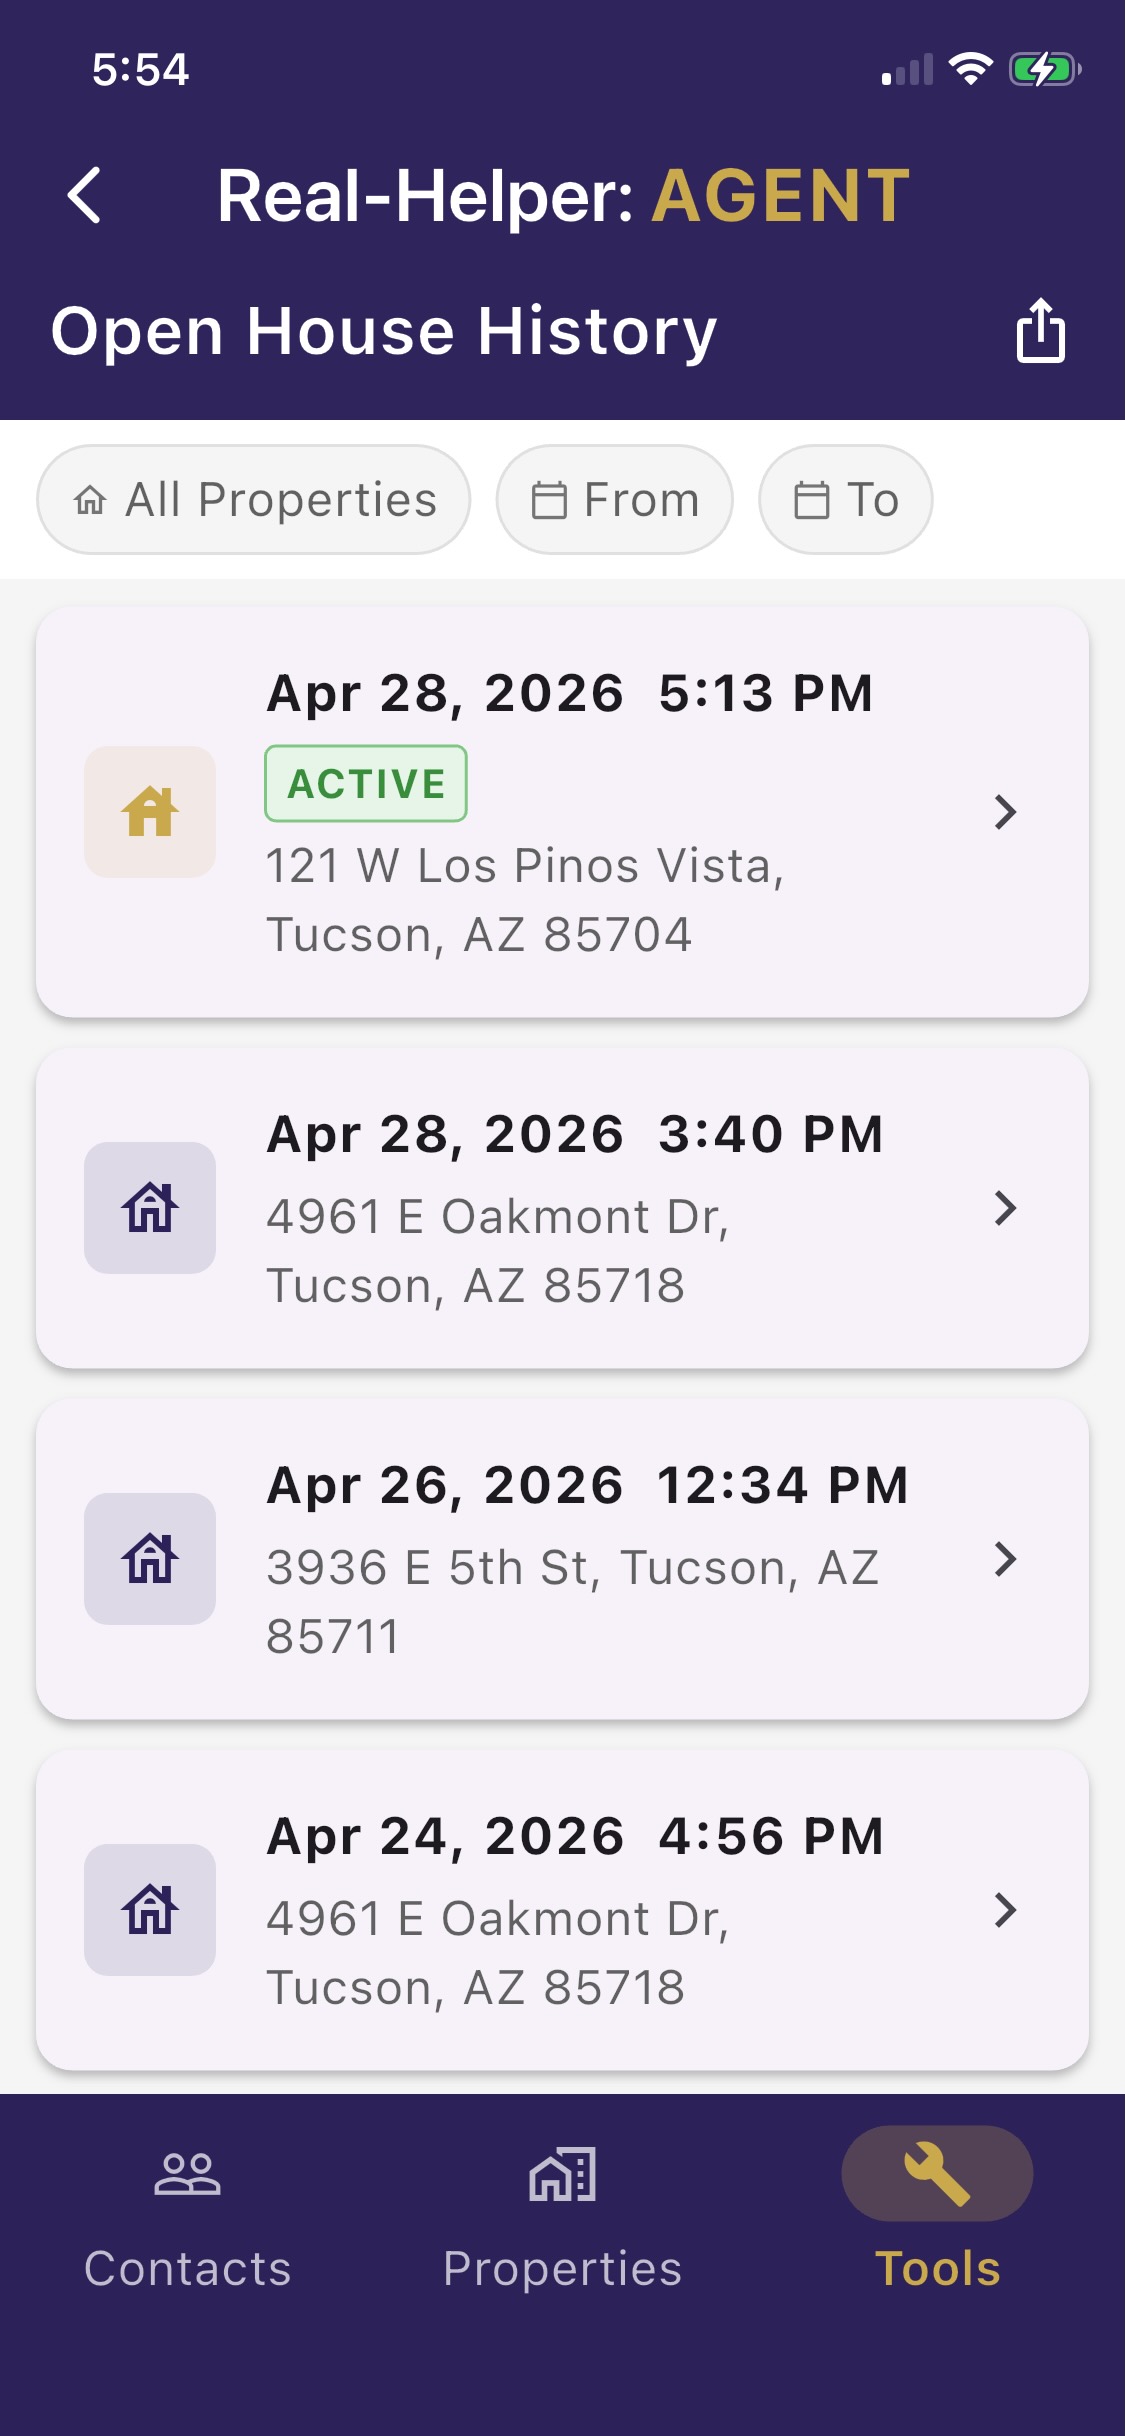
Sign-In History
All sign-ins are saved and accessible any time after the event. Tap an open house in the history list to see the full sign-in sheet with names, emails, and phone numbers.
From the history view you can also export the sign-in list — useful for follow-up emails or adding visitors to your CRM.
Calendar Integration
Real-Helper: Agent can turn a chat conversation into a calendar event — saved to your own calendar and sent to your buyer right in the thread, where they can add it to their calendar too.
Creating an Event from Chat
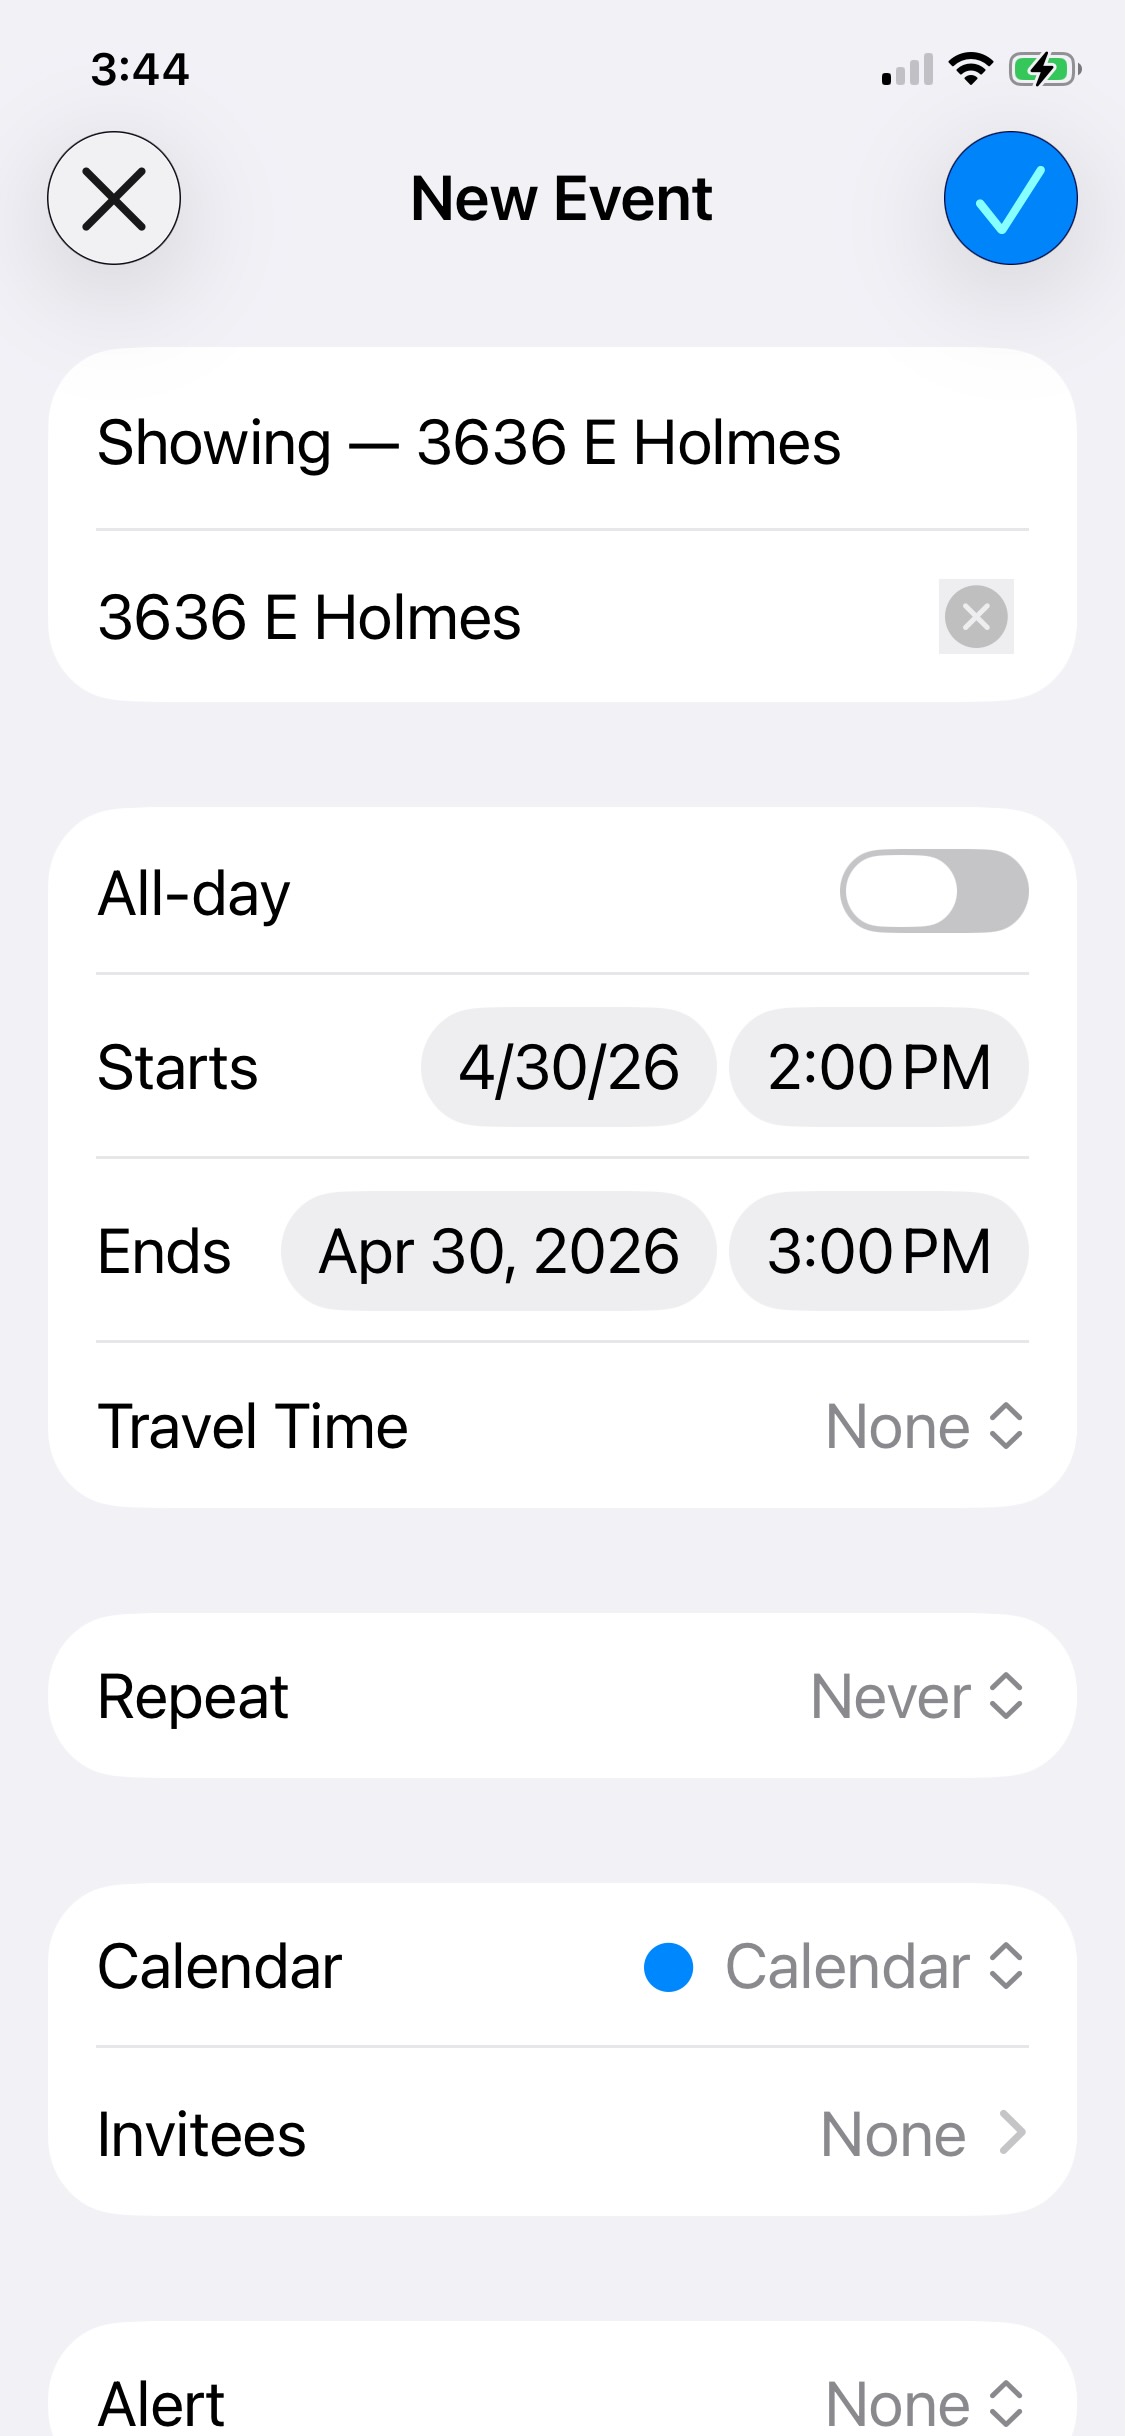
While chatting with a contact about a showing or meeting, tap the calendar button in the chat toolbar. The app reads the conversation and pre-fills an event with its best guess of the property address, date, and time.
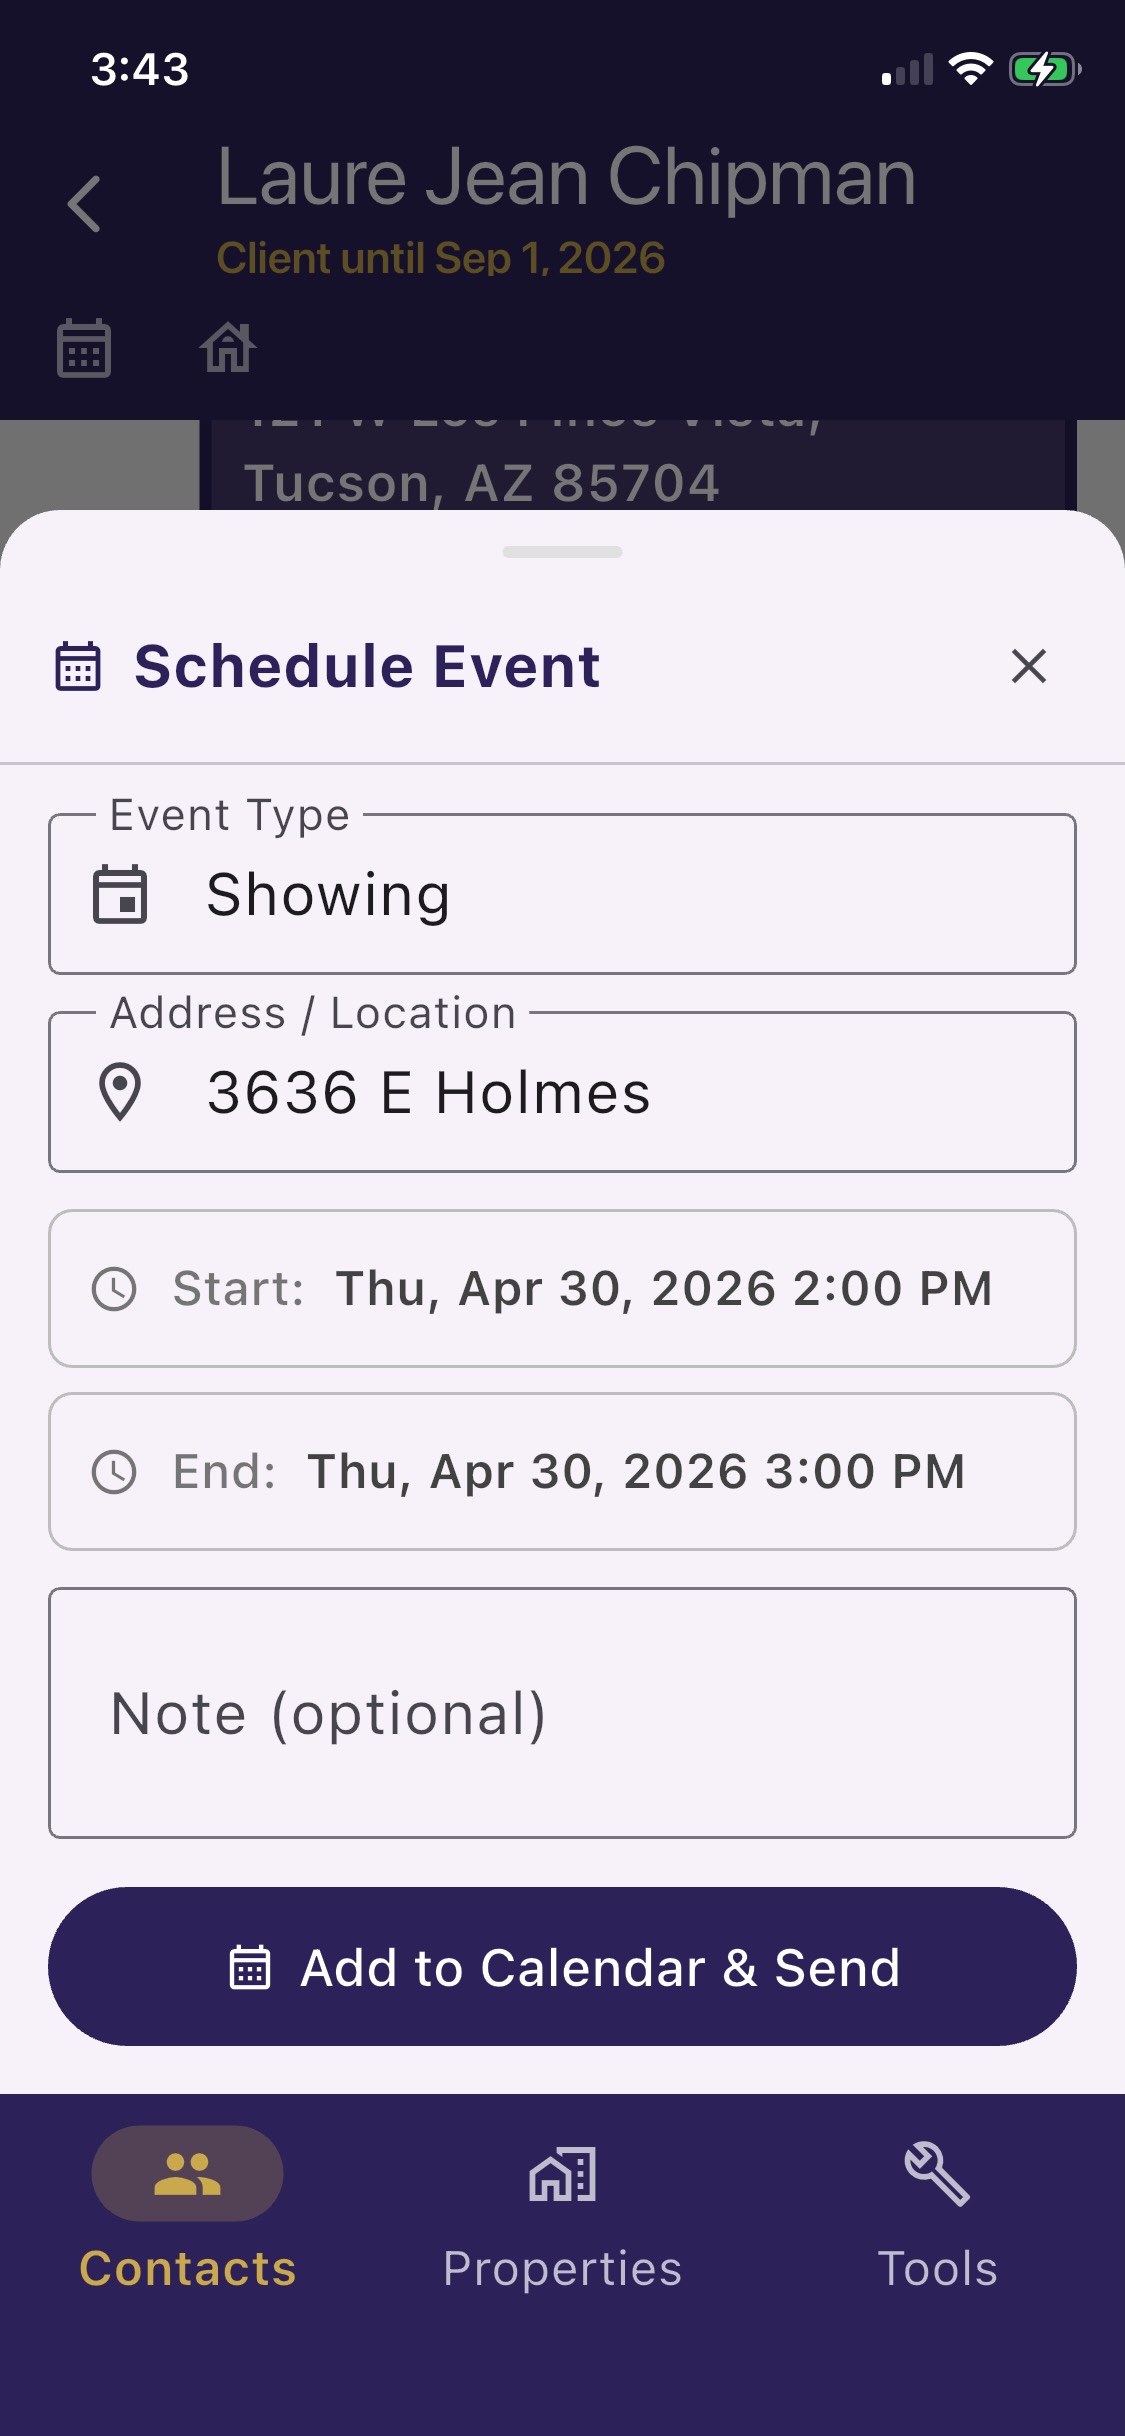
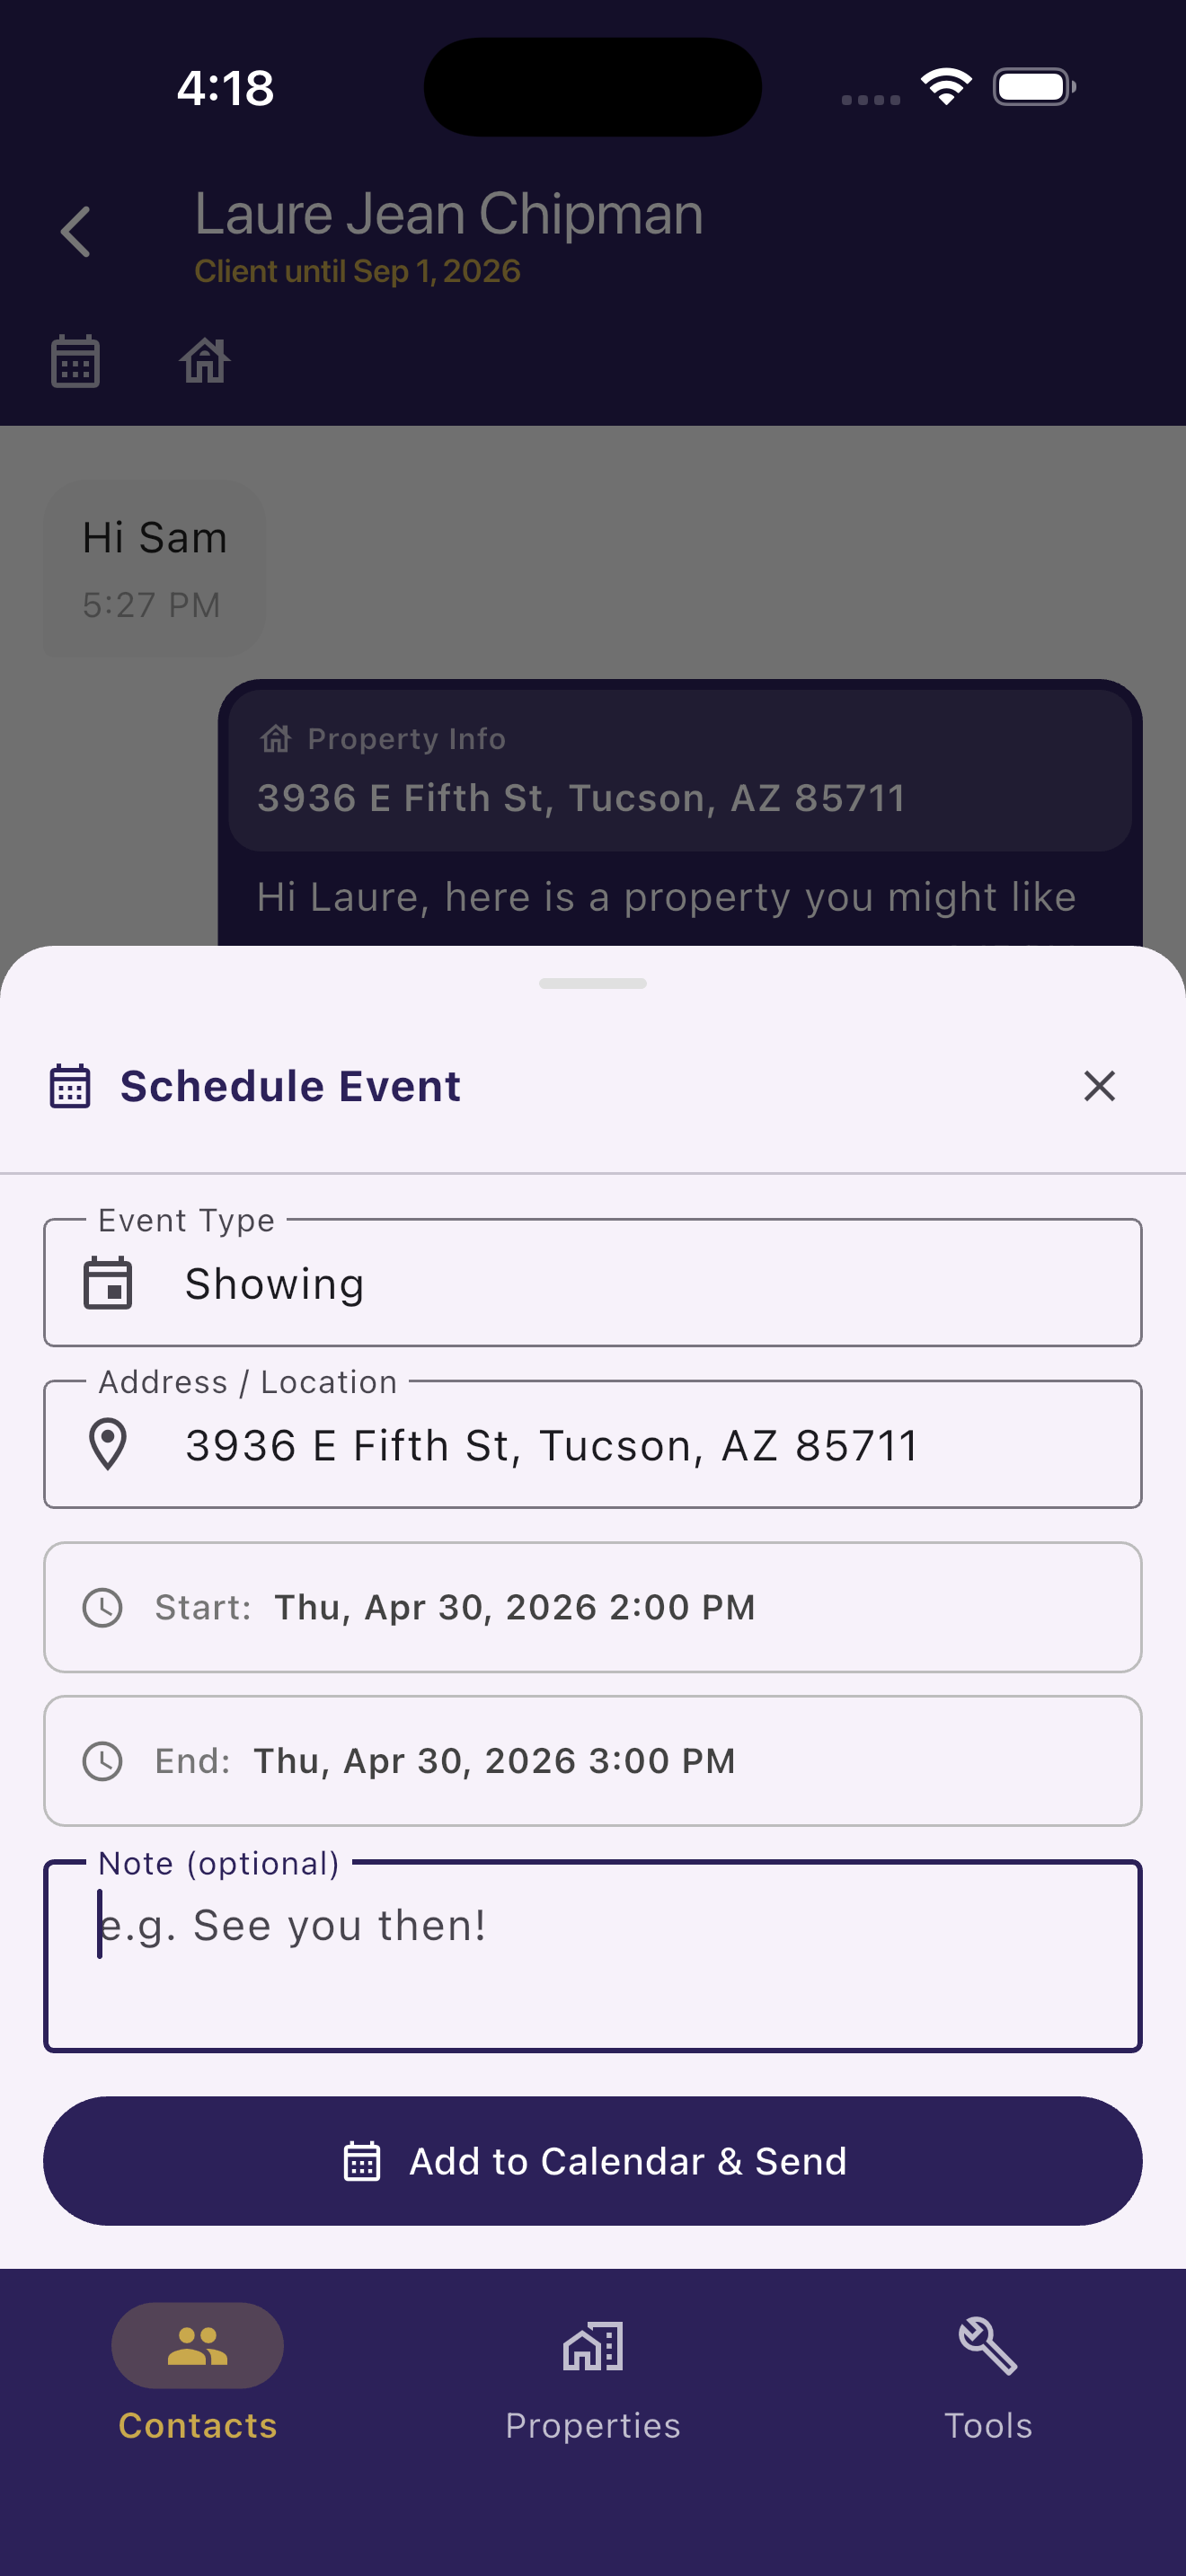
- 1In a chat thread, tap the calendar icon in the message toolbar.
- 2Review the pre-filled event details — property address, date, and time extracted from the conversation. Edit anything that needs adjusting.
- 3Tap Save to My Calendar to add the event to your device's iOS calendar.
- 4Tap Send to [Contact] to post the event card into the chat thread so your buyer receives it.
💡 Tip: Grant calendar access when prompted (first time only). The event is added to your default iOS calendar — you'll see it alongside your other appointments.
Buyer Side — Adding the Event to Their Calendar
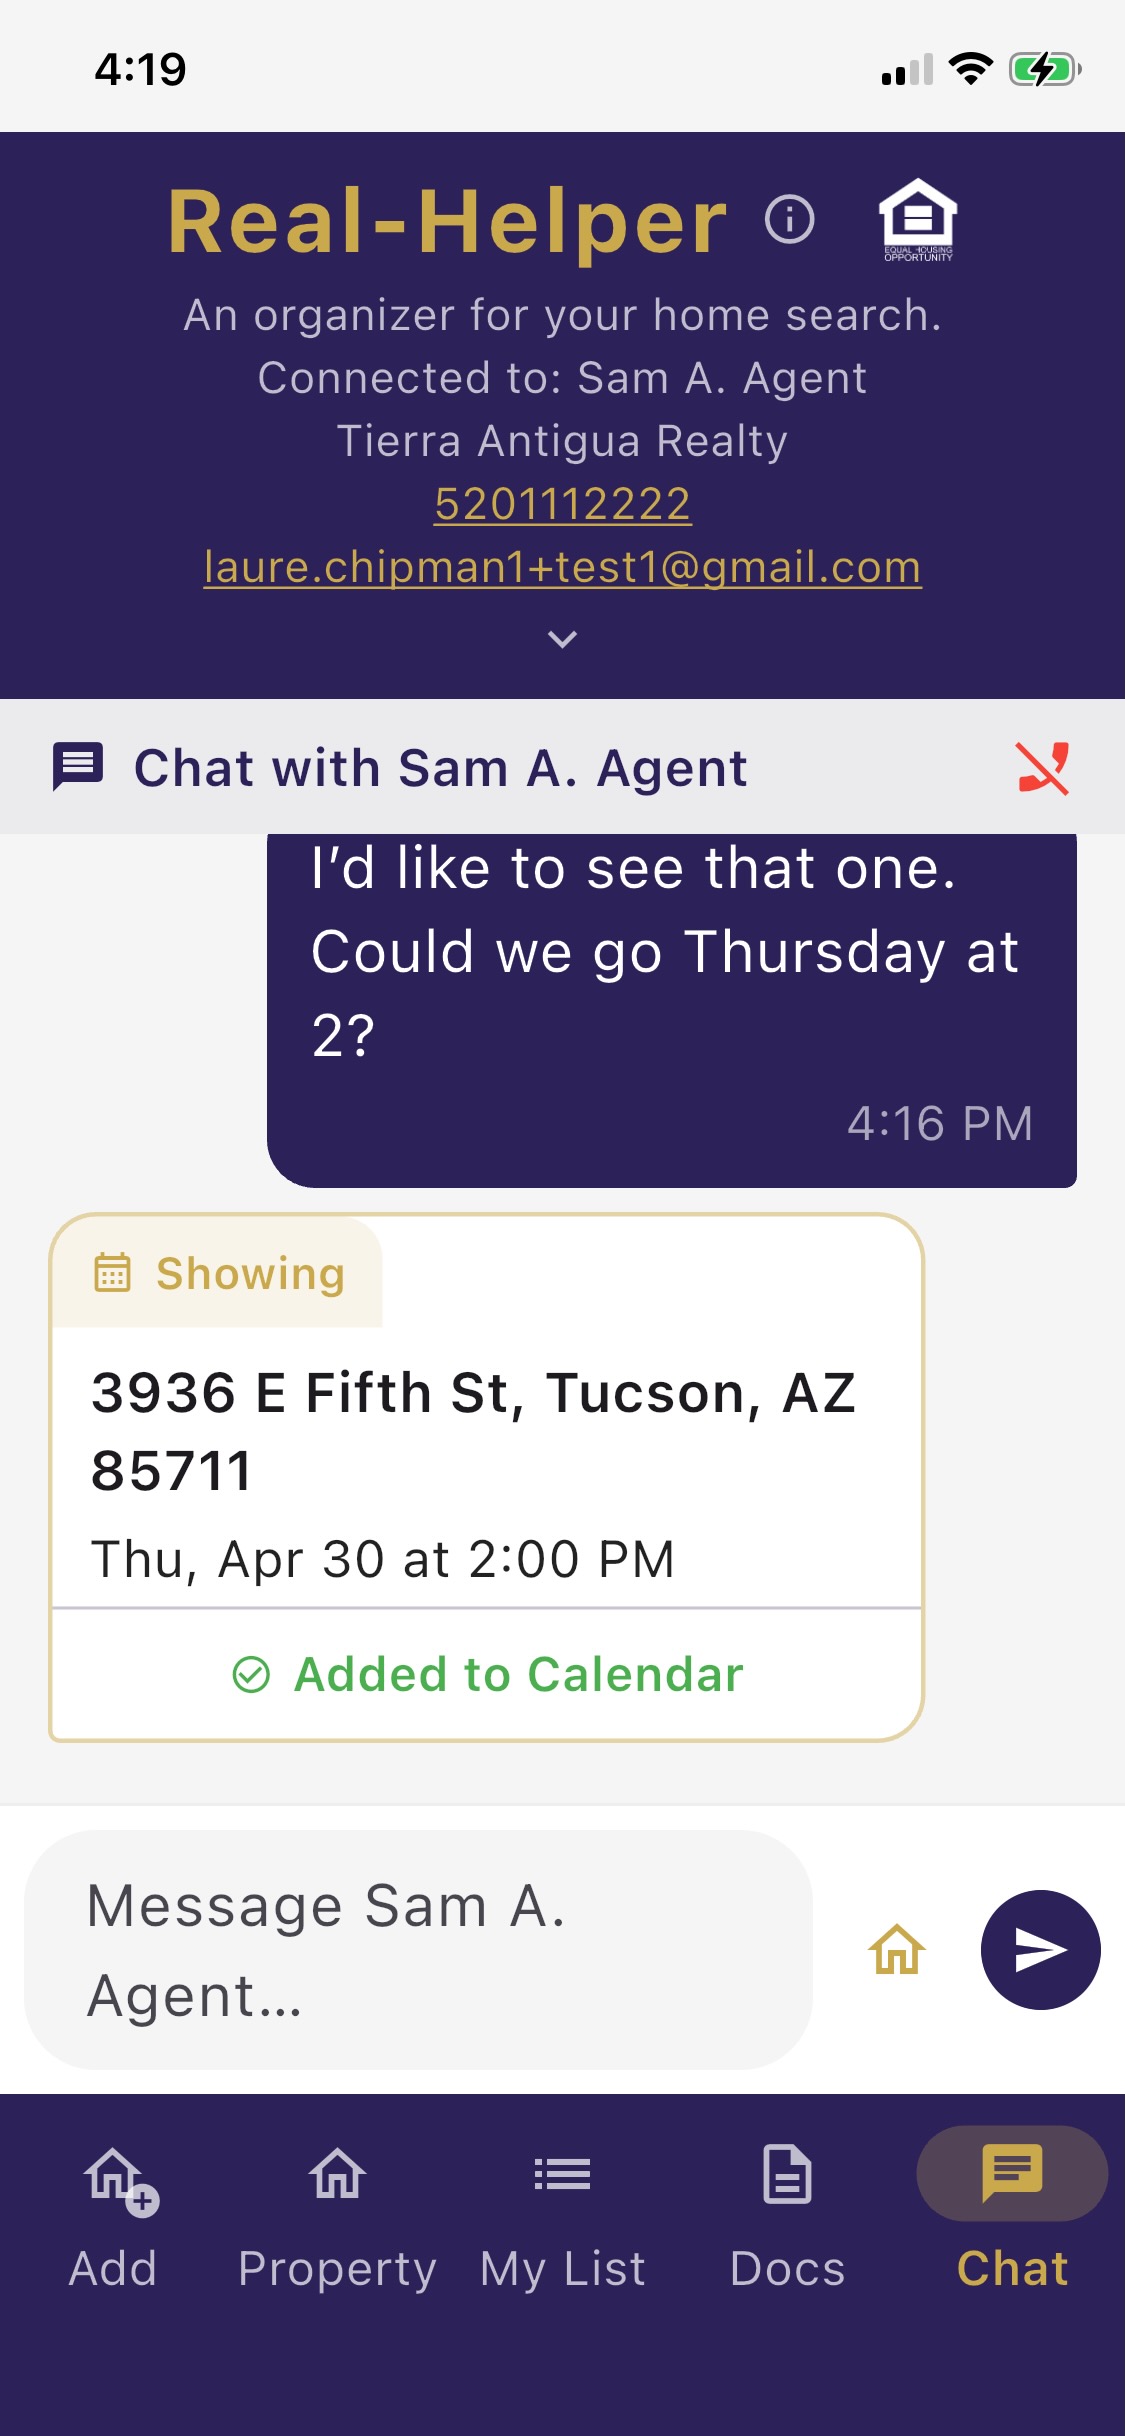
When the event card arrives in your buyer's Real-Helper chat thread, they can tap it to add the showing directly to their own device calendar — no copy-pasting required.
Notifications
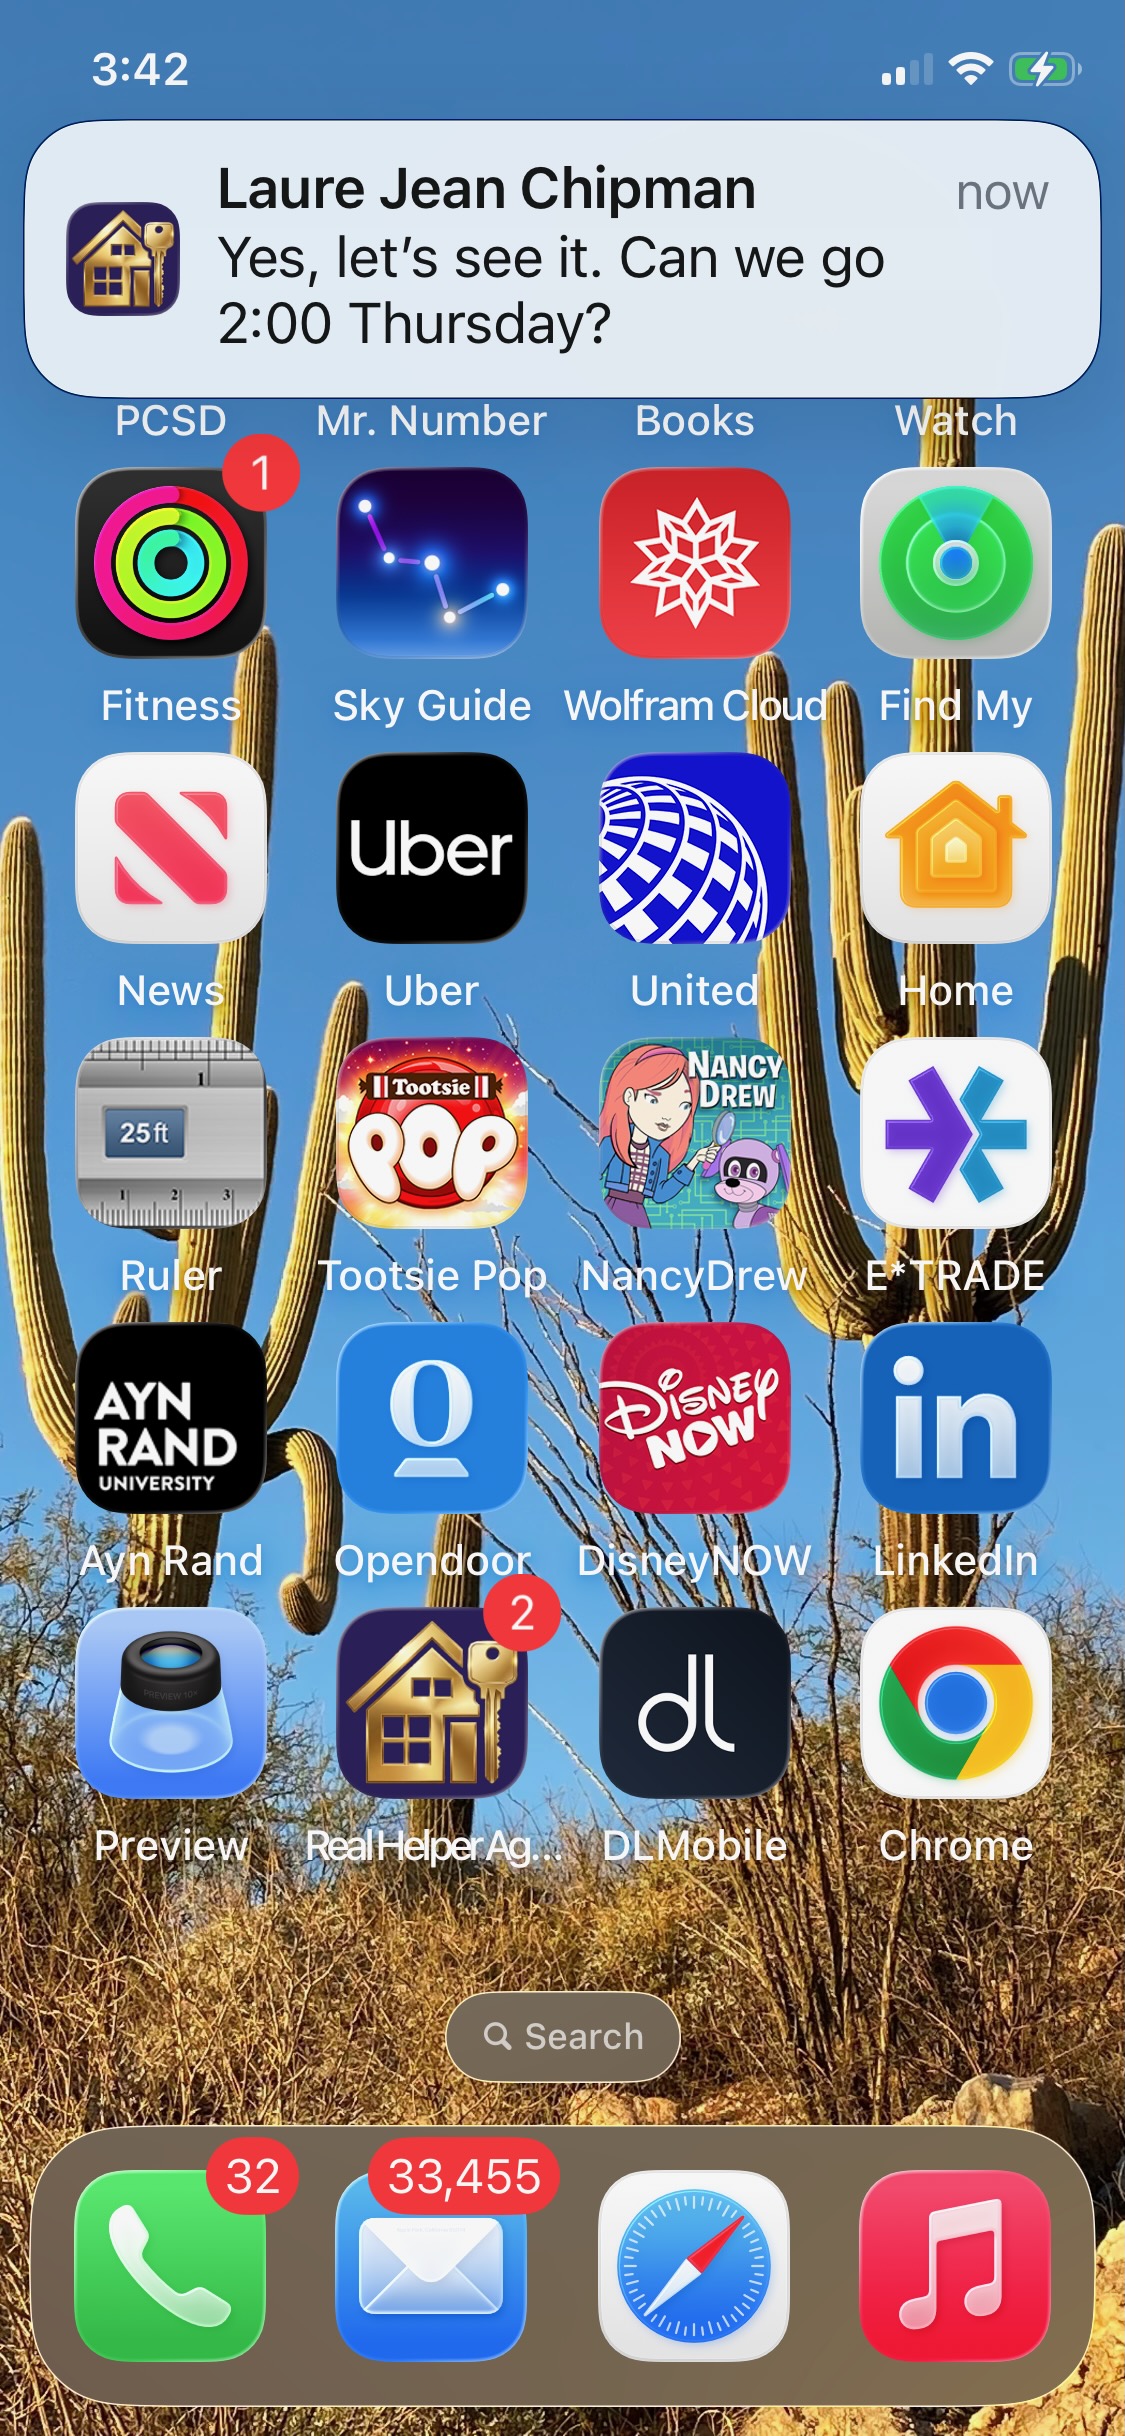
Real-Helper: Agent sends push notifications when a connected buyer sends you a message or when a new QR code sign-in arrives during an open house.
Enabling Notifications
- 1On first launch the app will ask permission to send notifications. Tap Allow.
- 2If you accidentally tapped Don't Allow, go to iOS Settings → Real-Helper: Agent → Notifications and enable them there.
💡 Tip: Notifications from QR code sign-ins during open houses are especially useful — you'll know the moment someone scans your code even if you're in another room.
Activity Log
The Activity Log gives you a chronological view of everything that's happened across all your contacts — new messages, property shares, and open house sign-ins — in one feed.
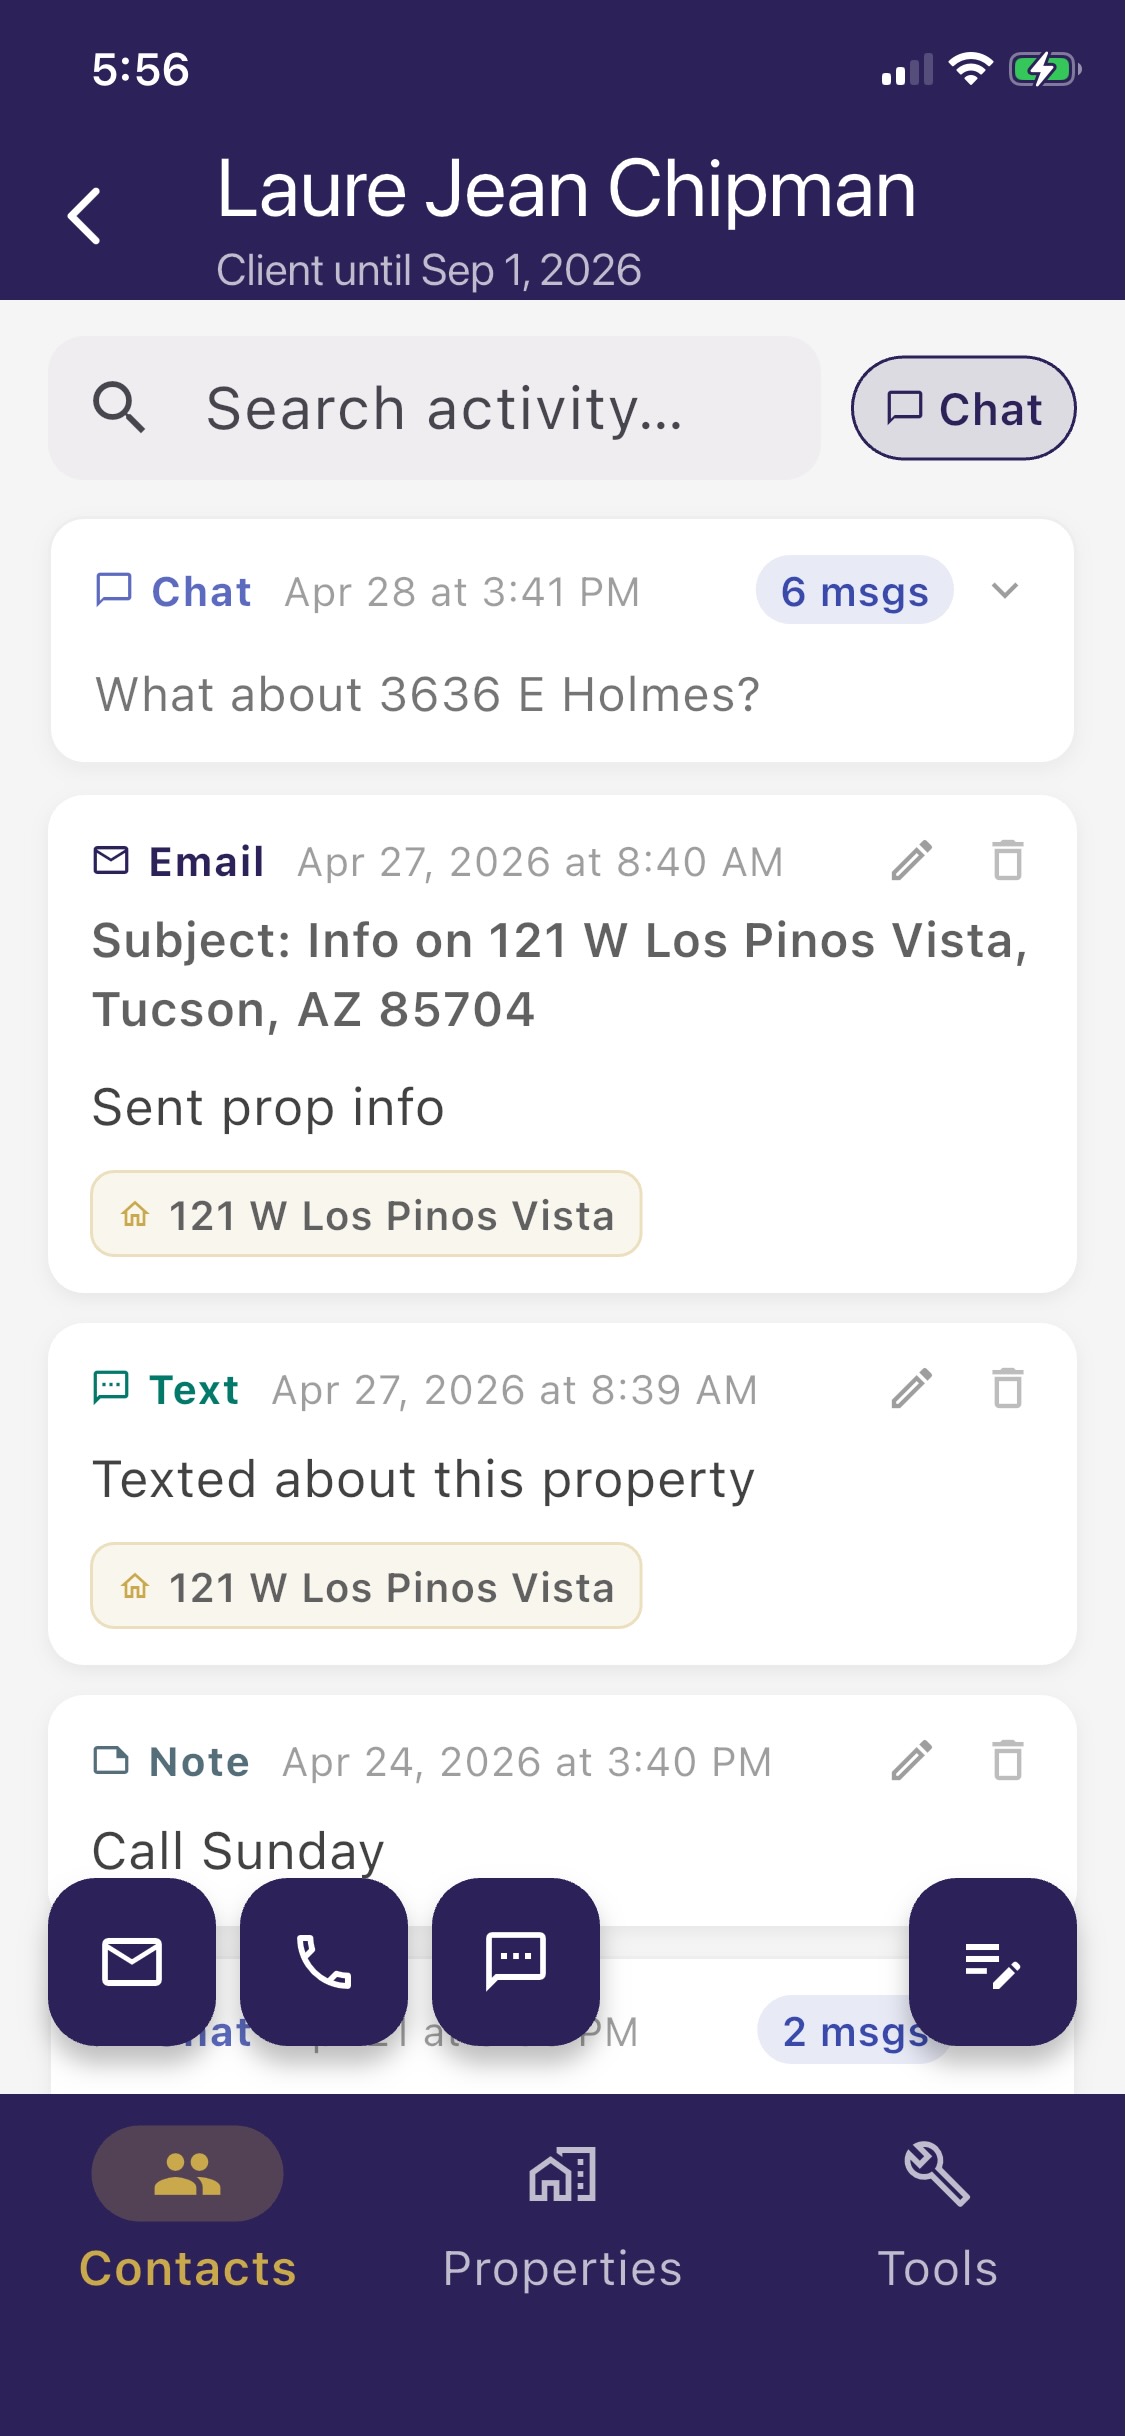
Tap any entry in the Activity Log to jump directly to the relevant contact, property, or open house record. It's the fastest way to catch up after time away from the app.
Buying a County Property Data Pack In-App Purchase
Property Data queries are sold in packs of 10 for $3.99, purchased as a one-time in-app purchase through Apple. There is no subscription.
How to Purchase
- 1Tap Get Property Data on any property detail page when your query count is zero.
- 2The County Property Data Pack sheet appears, showing what's included and the price.
- 3Tap Buy. The standard App Store purchase confirmation appears.
- 4After Apple confirms the purchase, 10 queries are added to your account within a few seconds.
- 5The app automatically proceeds to fetch the Property Data for the property you were viewing.
Tracking Your Remaining Queries
Your current query count appears next to the Get Property Data button on every property detail page. Queries do not expire and are tied to your account — they carry over if you reinstall the app or switch devices.
ℹ️ Note: Deleting your account forfeits any unused queries. There is no way to transfer query credits between accounts, and Apple's standard refund policy applies to all in-app purchases.
Buying More Packs
You can purchase additional packs any time — just tap Get Property Data when your count reaches zero, or buy proactively before a busy week. There is no limit to how many packs you can own.